Discrete gauges

Discrete gauges are graphical objects, which represent discrete scalar values. The range value is divided into a defined number of blocks, and each block has a specific graphical representation.

Users can indeed choose the most appropriate block according to the number of output needed.
For instance, if users need to represent a binary value, the most suitable gauge is the Like, as it has only 2 outputs.

The Discrete gauges only have one tab, which is the INPUT tab.

Below, users can find the detailed description of the available options and their corresponding GOLD references.

Subsection

Option

Description

GOLD ref

Input options

Attribute

It shows the attribute name and type.

  • input
    ["table"]
    str

  • input
    ["attr"]
    str

Aggregate Operator

It defines the operation users want to perform on data.
The possible operations vary according to the type of attribute. Click here for a detailed list.

input
["aggrfunc"]
str

Free Formula

Where users can insert a specific formula, if needed.

input
["formula"]
str

State Options

Label

It shows the possible graphical outputs of the gauge.

input

  • ["filter","red",0] where 0 is the filter written in the $”tablename!attributename” in {‘value’}
  • ["filter","red",1] where 1 is the filter written enclosed in curve brackets and introduced by the corresponding aggregate operator.
    str

Filter

By clicking the SET FILTER button, a configuration window will appear. Check the instructions to set filters for the attribute type you dragged onto the gauge here.

  • input
    ["filter","red",0] where 0 is the filter written in the $”tablename!attributename” in {‘value’}
    ["filter","red",1] where 1 is the filter written enclosed in curve brackets and introduced by the corresponding aggregate operator.
    str

  • input
    ["filter","yellow",0] where 0 is the filter written in the $”tablename!attributename” in {‘value’}
    ["filter","yellow",1] where 1 is the filter written enclosed in curve brackets and introduced by the corresponding aggregate operator.
    str

  • input
    ["filter","green",0] where 0 is the filter written in the $”tablename!attributename” in {‘value’}
    ["filter","green",1] where 1 is the filter written enclosed in curve brackets and introduced by the corresponding aggregate operator.
    str

  • input
    ["filter","like",0] where 0 is the filter written in the $”tablename!attributename” in {‘value’}
    ["filter","like",1] where 1 is the filter written enclosed in curve brackets and introduced by the corresponding aggregate operator.
    str

  • input
    ["filter","dislike",0] where 0 is the filter written in the $”tablename!attributename” in {‘value’}
    ["filter","dislike",1] where 1 is the filter written enclosed in curve brackets and introduced by the corresponding aggregate operator.
    str

  • input
    ["filter","sun",0] where 0 is the filter written in the $”tablename!attributename” in {‘value’}
    ["filter","sun",1] where 1 is the filter written enclosed in curve brackets and introduced by the corresponding aggregate operator.
    str

  • input
    ["filter","suncloud",0] where 0 is the filter written in the $”tablename!attributename” in {‘value’}
    ["filter","suncloud",1] where 1 is the filter written enclosed in curve brackets and introduced by the corresponding aggregate operator.
    str

  • input
    ["filter","cloudsun",0] where 0 is the filter written in the $”tablename!attributename” in {‘value’}
    ["filter","cloudsun",1] where 1 is the filter written enclosed in curve brackets and introduced by the corresponding aggregate operator.
    str

  • input
    ["filter","cloud",0] where 0 is the filter written in the $”tablename!attributename” in {‘value’}
    ["filter","cloud",1] where 1 is the filter written enclosed in curve brackets and introduced by the corresponding aggregate operator.
    str

  • input
    ["filter","rain",0] where 0 is the filter written in the $”tablename!attributename” in {‘value’}
    ["filter","rain",1] where 1 is the filter written enclosed in curve brackets and introduced by the corresponding aggregate operator.
    str

  • input
    ["filter","rain2",0] where 0 is the filter written in the $”tablename!attributename” in {‘value’}
    ["filter","rain2",1] where 1 is the filter written enclosed in curve brackets and introduced by the corresponding aggregate operator.
    str

  • input
    ["filter","thunder",0] where 0 is the filter written in the $”tablename!attributename” in {‘value’}
    ["filter","thunder",1] where 1 is the filter written enclosed in curve brackets and introduced by the corresponding aggregate operator.
    str

  • input
    ["filter","superhappy",0] where 0 is the filter written in the $”tablename!attributename” in {‘value’}
    ["filter","superhappy",1] where 1 is the filter written enclosed in curve brackets and introduced by the corresponding aggregate operator.
    str

  • input
    ["filter","happy",0] where 0 is the filter written in the $”tablename!attributename” in {‘value’}
    ["filter","happy",1] where 1 is the filter written enclosed in curve brackets and introduced by the corresponding aggregate operator.
    str

  • input
    ["filter","neutral",0] where 0 is the filter written in the $”tablename!attributename” in {‘value’}
    ["filter","neutral",1] where 1 is the filter written enclosed in curve brackets and introduced by the corresponding aggregate operator.
    str

  • input
    ["filter","sad",0] where 0 is the filter written in the $”tablename!attributename” in {‘value’}
    ["filter","sad",1] where 1 is the filter written enclosed in curve brackets and introduced by the corresponding aggregate operator.
    str

  • input
    ["filter","supersad",0] where 0 is the filter written in the $”tablename!attributename” in {‘value’}
    ["filter","supersad",1] where 1 is the filter written enclosed in curve brackets and introduced by the corresponding aggregate operator.
    str

Code

Here the filter code will be shown.

Once all the configurations have been set, click APPLY to ultimate the process.

As a result, according to the outcomes of the operation, the gauge will assume the output that was previously associated to a certain condition.

Note

The Discrete gauges options cannot be parametrized.

Note

One of the labels will necessarily remain unselected, so that if none of the conditions is satisfied, the gauge will assume the aspect of the remaining unset label. Users can specify which Label will remain unset in the INPUT window.

Most of the values in the Layout options are common to all the Discrete gauges, except for some features related to the graphical aspect of each specific gauge, which are explained in detail below.


Traffic light

https://cdn.rulex.ai/docs/Studio/trafficlight.webp

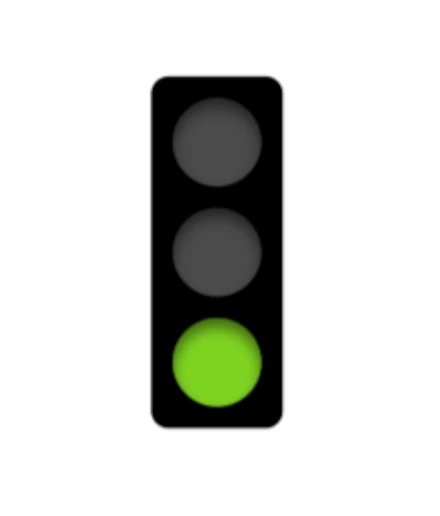
By default, this gauge has the aspect of a traffic light with a green light on.

According to the results related to the filters and the conditions set by the user, the colors of the traffic light will vary.

The three possible outputs are: red, yellow and green color.


Like

https://cdn.rulex.ai/docs/Studio/like.webp

By default, this gauge has the aspect of a thumbs up.

According to the results related to the filters and the conditions set by the user, the thumb position will vary.

The two possible outputs are: thumbs up and thumbs down.


Weather

https://cdn.rulex.ai/docs/Studio/weather.webp

By default, this gauge has the aspect of a sun.

According to the results related to the filters and the conditions set by the user, the weather icon will vary.

The seven possible outputs are: storm, heavy rain, rain, cloud, slightly cloudy, slightly sunny and sun.


Rulebot

https://cdn.rulex.ai/docs/Studio/rulebot.webp

By default, this gauge has the aspect of a happy green Rulex icon.

According to the results related to the filters and the conditions set by the user, the color and the mood of the Rulebot will vary.

The possible five outputs are: angry and red, sad and orange, neutral and blue, smiling and light-green, happy and green.