Data Manager functions
Rulex Factory Data Manager task allows users to apply a wide range of functions on its underlying data.
These functions are applied by using the integrated Formula toolbar: a general introduction and overview about this component is available in this section.
Functions are organized in families to group similar operations. Function families currently available in Rulex Factory are:
Each of these families will be presented in detail in a dedicated page. Follow the links contained in the list above to get more information about the desired functions.
Tip
During Formula toolbar typing, an autocomplete suggestion will appear, anytime you will start a possible function insertion.
Common operators in formulas
The following common operators are supported in Data Manager formulas:
" ": string delimiter. Strings are always enclosed in quotation marks, and can contain any character.$: identifies a column/attribute in a dataset.(): list parenthesis. Brackets can be used in 2 main ways:to group parameters in order to define priorities;
to group together parameters in lists that must be passed together in a single field.
,: separates parameters in a list.:: indicates a range between columns. It must be used as part of a list, and consequently be delimited by brackets./: minus operator.+: plus operator.*: product operator.^: power operator.<: less than angle bracket.>: greater than angle bracket.!=: does not equal, is different from. When it is used with None values, it can’t manage them, so it returns an empty cell.\: backslash is the escape character. It has two possible applications inside a string:it can be used when you need to embed a string within a string - the backslash before the quotes allows you to do that.
it indicates special characters in strings. If we want to insert a real backslash in a string, itself must be escaped (
\\)
/: division operator.==: equals in comparison. The=symbol, which assigns a value, is inserted automatically between the left and right side of the formula by Rulex. When dealing with theNonevalue in nominal attributes, the==symbol returns a binaryTrueorFalsein any case.%: modulo operator (it evaluates the rest in a division).
The following operators are expressed as words:
is: equals to. This operator is different from the==symbol because it returns a binaryTrueorFalsevalue in any case with any attribute type. It is particularly important when dealing with theNonevalue.not is: does not equal, is different from. This operator is different from the!=symbol because it returns a binaryTrueorFalsevalue in any case. It is particularly important when dealing with theNonevalue.in: this operator returns a binary value. It returnsTruefor any element of the first column which is contained in the second column.not: does not equal, is different from. This operator is different from the!=symbol because it precedes an argument, it’s not used to build it.and: this operator returns a binaryTrueorFalsevalue. It returnsTrueif the two conditions are both true. It returnsFalseif even one of the conditions is false. Theandoperator implies that both the conditions set have to be satisfied, in order to have True as a result.or: this operator returns a binaryTrueorFalsevalue. It returnsTrueif at least one of the conditions is true. It returnsFalseif both the conditions are false. Theoroperator implies that at least one of the conditions set has to be satisfied, in order to have True as a result.
Searching for a desired function
To help you to understand the correct inputs for a particular function you want to use or simply to search for a desired operation among the whole list of all Data Manager functions, you can use the Insert Function Menu.
To open the Insert Function Menu, you have to click on the Formula icon button located next to the equal sign in the middle of the Formula toolbar.
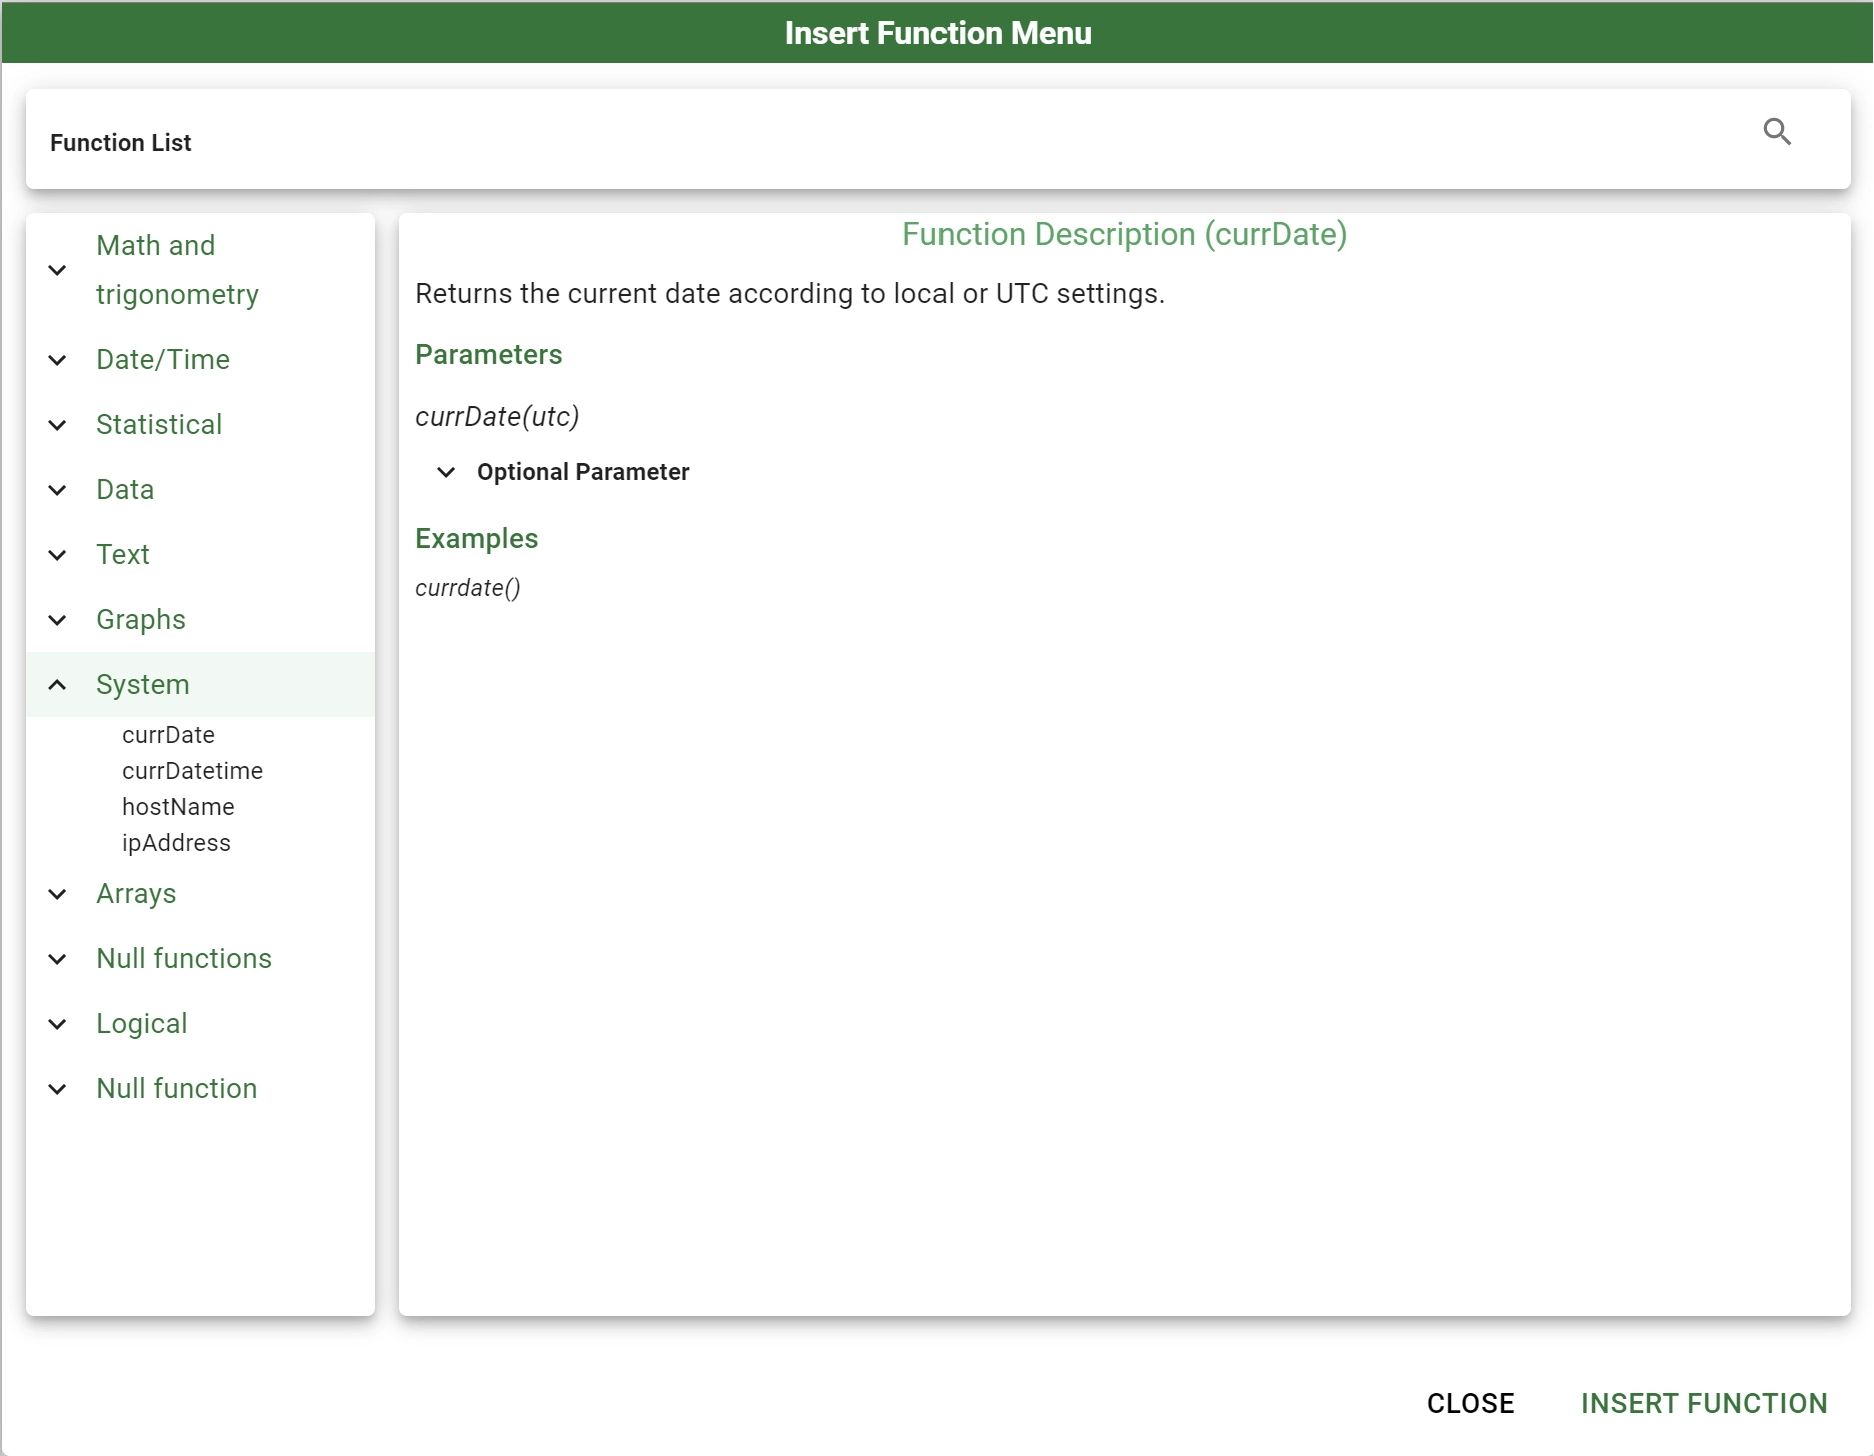
The Insert Function Menu panel is divided in two areas: on the left a collapsible list is available, where all the functions are listed divided by their families, on the right the main properties of the selected function are shown, if there are any.
To select a function users simply have to click on a particular entry of the function list located on the left. To expand a function family, simply click on the corresponding family name.
Once a particular function is going to be selected, the panel on the right is populated with the following information:
Function Description: a brief description of the function and its behavior.
Parameters: meaning the signature of the function with the name of all its input parameter. This section is divided in: * Mandatory Parameter: the list of all the parameters of the functions which are mandatory, with a brief description of their use. * Optional Parameter: the list of all the parameters of the function which are optional, with a brief description of their use and their default value if they are not specified.
Examples: a list of possible examples for the current function.
Note
To find the desired function you can use the magnifier icon located at the top right of the panel next to the Function List title. By inserting a search text here, you will accordingly filter the left list to show only functions which contains your provided text.
Buttons located at the bottom of the panel allow users to perform the following operations:
Insert function: it will close the panel by inserting the selected function, if any in the right term of the Formula toolbar at the end of the present text. The cursor is moved accordingly.
Close: it will simply close the panel.
Procedure
Click on the Formula icon button located next to the equal sign in the Formula toolbar to open the Insert Menu Function
Click on the magnifier icon located at the top right of the new panel to insert a text to be searched for.
Insert the starting letters of the chosen function in the provided search text field.
Select the desired function from the filtered list on the left of the panel.
Look at the function description which is going to appear on the right of the panel.
Click Insert function button to close the panel by inserting the function in your Formula toolbar