Operating with your Data
The main difference between Rulex Studio custom interface and a general dashboarding system is its interactivity.
Indeed, Rulex Studio interactions do not only tune the data representation, but allow the user to perform entire scripted operations. These interactions permit the user for example to modify data, to change input attributes of widget descriptions, to open popup or helping mask, to send mail or alert or report, to compute some stored procedures.
Dashboarding is brought in Rulex Studio component to a new level; the whole tool allows the user to construct a real web interface with online forms, buttons and toolbars all around our data visualization.
This possibility is mainly covered by two tools: the Events and the following widget families
For what concerns Events, this section is dedicated to their description and configuration.
Actions
Actions are Widgets of Rulex Studio for which the Event associated to the onChange trigger is already defined by the widget itself. It performs a Data filtering operation.
By operating on an Action widget, a filter is triggered on an underlying Dataset, leading to a Data filtering effect.
This effect by default operates on all the other Widgets on the same slide, but this scope can be configured to reduce this effect.
In Rulex Studio, users can choose among different types of Filter actions:
Actions differ from one another not only graphically but also in how they allow the selection of values, which are then used in filter construction. For example, some actions allow selecting only one value at a time, others allow multiple values, and some allow only numbers or ranges.
In the Actions layout menus page, users will find all the information regarding the available configuration options of each action type, as well as their filtering characteristics.
Note
The event triggers available for the Actions widgets change according to the action type. A box with a list of the event triggers available for each action filter is available in the corresponding page.
As previously mentioned, Actions are strictly related to other widgets on the same slide. Once dragged, Actions are automatically linked to all other widgets on the slide to create a dynamic dashboard. This link between an Action and all the Widgets can be edited in the scope section, as explained below.
The first step to start working on actions is to drag an Action from the Widgets panel onto the stage and, subsequently, drag the attribute whose values will be filtered by the action.
As soon as the attribute has been dragged onto the action, the Layout options window will automatically open allowing users to start the configuration process.
The Layout options menu is made of two tabs:
INPUT tab, where users define all the information regarding the data to import and the filter/s to set. The Layout options menu is not populated with options if it is opened before dragging an attribute onto the Action widget.
LAYOUT tab, where users customize the action layout. This menu changes according to the corresponding action type. More information on the options available and on the compatible attribute type for each Action can be found in the Actions layout menus page.
If users try to open the Layout options menu before associating an attribute to the widget itself, the INPUT tab will be empty, as it populates with options according to the attribute type which has been dragged onto the widget and according to the action type.
In the Scope Options section, in the Scope text field, users can specify the Widgets to which the operation will be applied.
By default, all the widgets which are present on the slide are included in the Scope. Users can also edit the Scope list, by using the text field or by opening the Select wanted window, which displays a list of all the widgets on the current slide and can be checked or unchecked.
Tip
To retrieve the widget’s name, users can check it in the Slides tab by clicking on the expand icon next to the slide’s name, or by clicking on the eye icon.
As a result, the Widgets specified in the Scope will update and will show the filtered data only when the Action is active.
Tip
By selecting an empty scope (meaning the Action will not reflect its natural effect on any other widget), and by adding a dedicated Event to the onChange trigger, it is possible to use the selected value (or values) of the Action for a different operation and not the already defined filter operation.
Data Filtering
The default effect of Actions when their internal values are changed is to trigger a Data filtering operation on the Dataset to which the attribute dragged onto them belongs.
This operation is performed following the steps below:
the selected value of the considered Action generates a filter code as in the pre or post-filter query manager.
By applying this filter code to the Dataset of the attribute dragged, a subset of dataset’s rows is considered. The index of the filtered rows is the output of the Action application.
Then, according to the dataset relations, the generated index is propagated through the other tables to produce second level effects.
All the widgets consider in the scope of the Action are refreshed to take into consideration an eventual modification in the underlying data due to the Data Filtering.
One of the point which needs further description, is the Data Filtering effect propagation. This propagation effect based on internal dataset relations, is identical to the propagation of the Data selection.
If an Action selects a subset of rows on the first dataset and a second dataset has some relations with the original dataset, a subset of rows is filtered also in the second dataset.
Therefore, even a widget using attributes from the second dataset will see the effect of the Action data filtering, as long as it is included in action scope.
The effect is described in the image below:

In fact, if different Widgets, representing data from different tables, share an attribute with the same name, the filter will be propagated to all of them.
Warning
Filters are propagated only once per dataset. If a dataset has already obtained an effect, it will no longer be considered again in the same data propagation.
Example
The following example uses the Client Data and the Transactions datasets.
Both datasets contain an attribute called Id, which is the attribute which will make the filter propagation possible, so basically both datasets will be filtered, even though the action was active on a specific attribute on one dataset.
In this case we are going to use the Filter drop down menu, two Vertical Bar chart and attributes from the tables: Clients_data and Transactions.
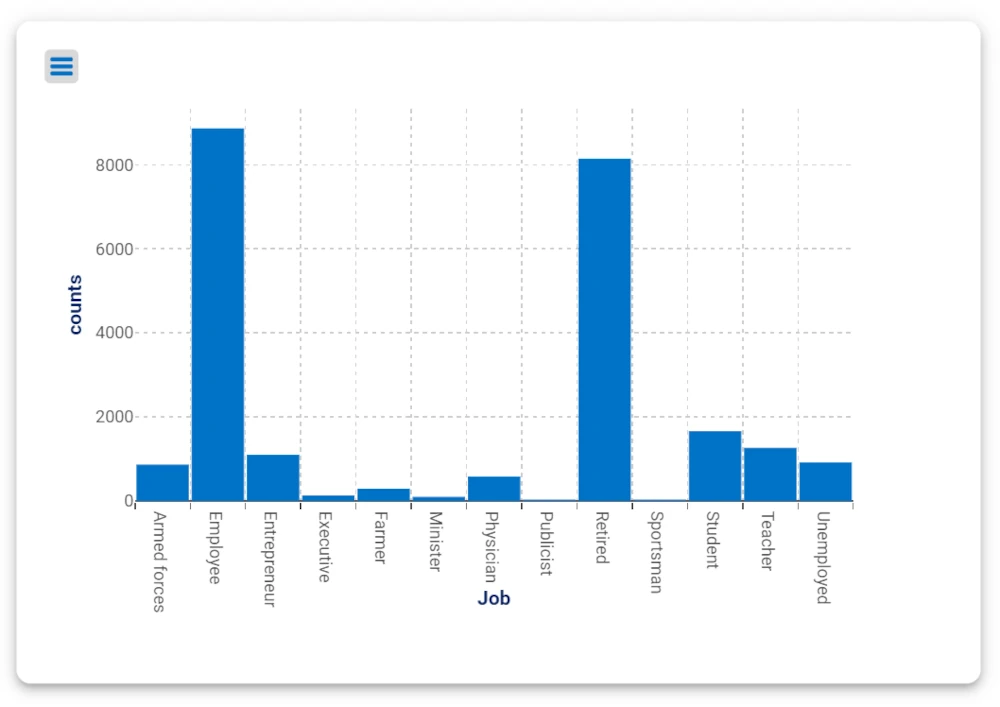
Drag the attribute Job contained in Clients_data table onto the X Axis of the first plot.
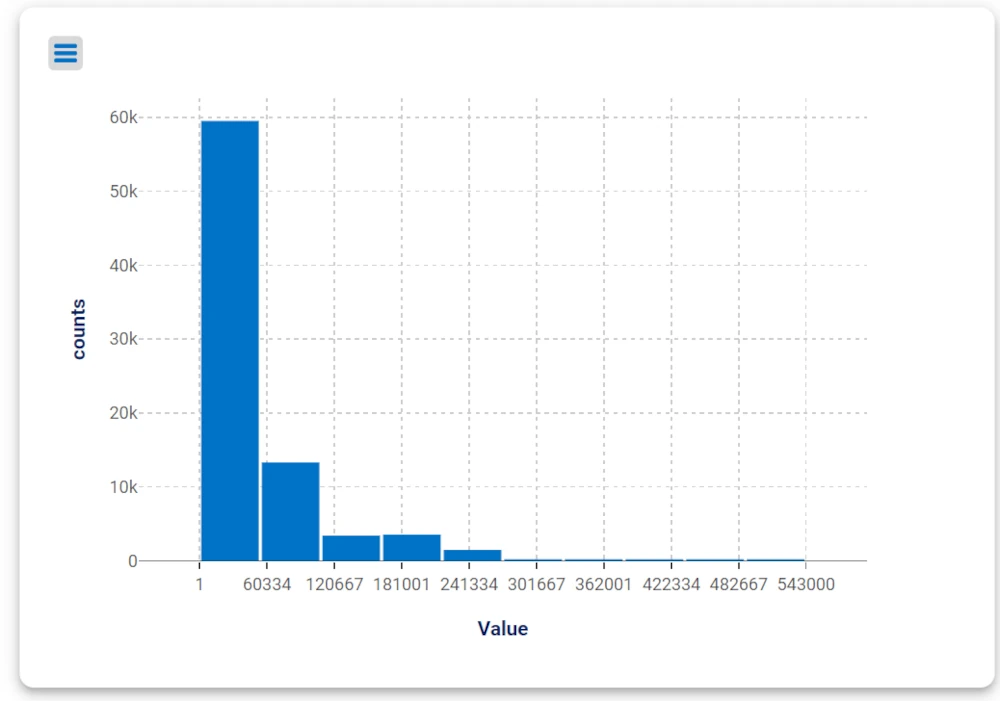
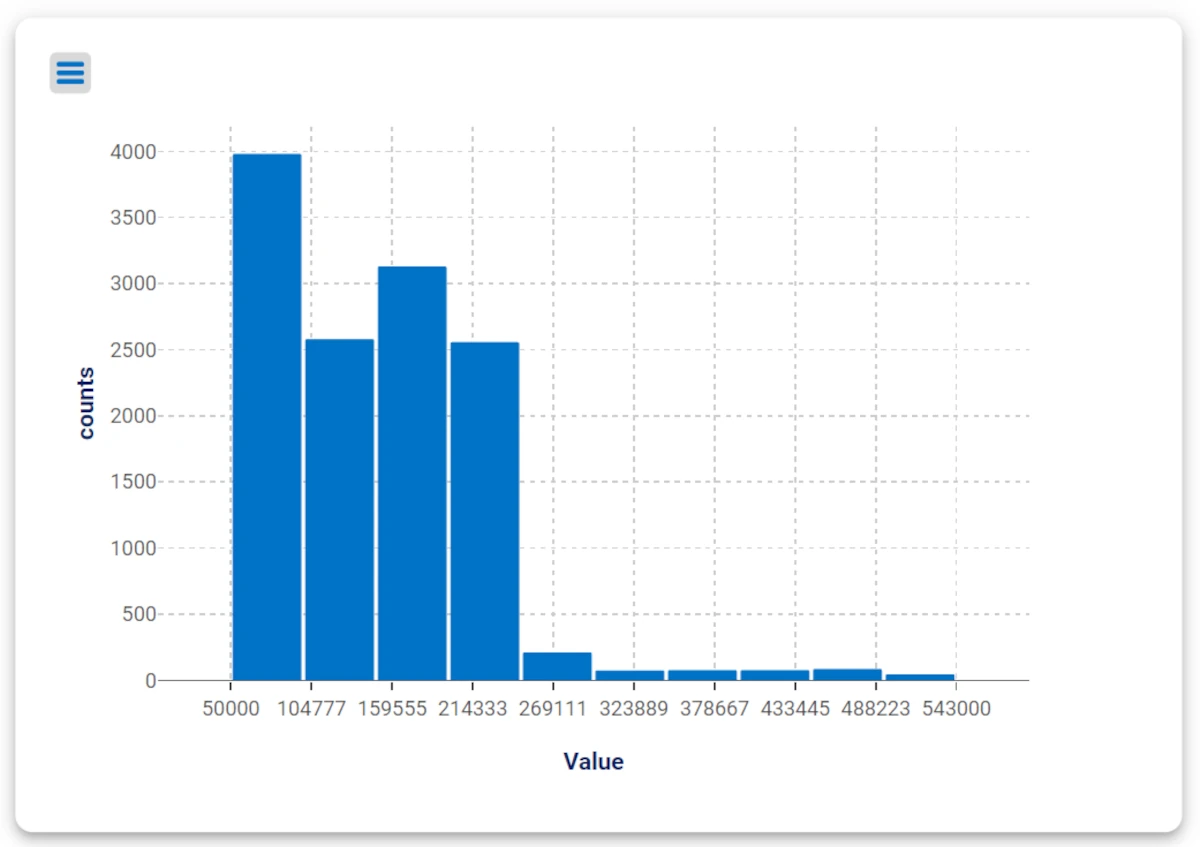
Drag the attribute Value contained in the Transactions table and onto the X Axis of the second plot.
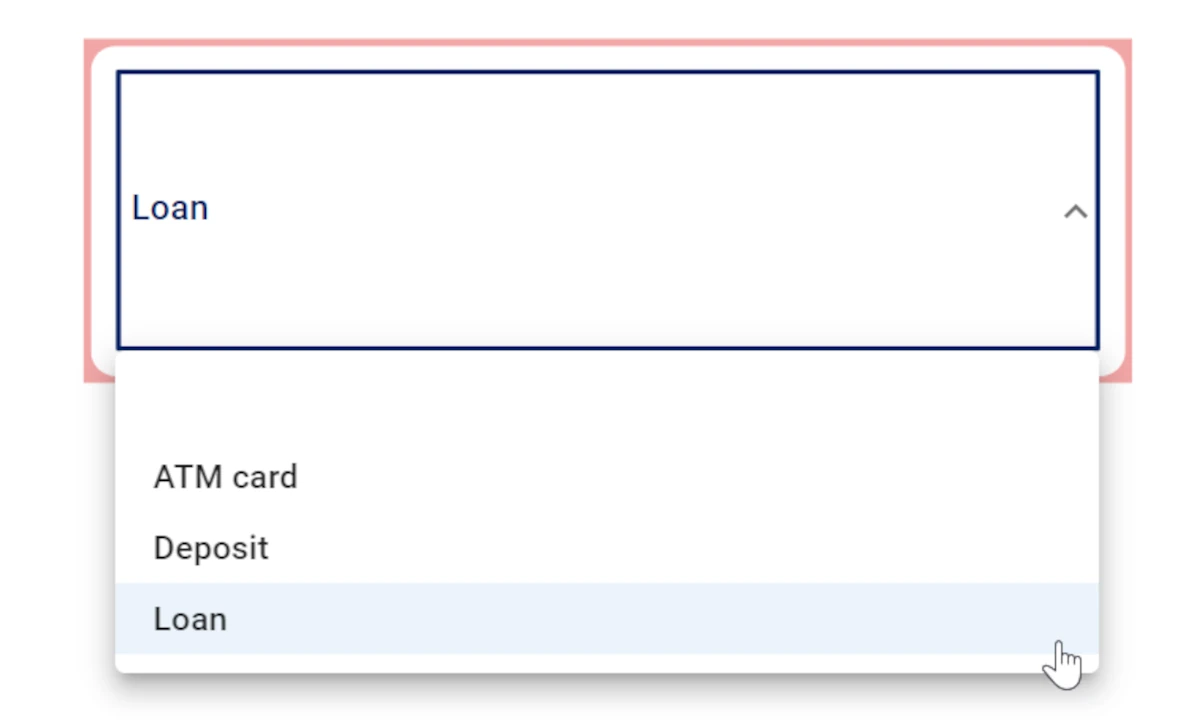
Drag a Filter drop down menu onto the slide and drop onto it the attribute Product contained in the Transactions dataset.
At this point, the Layout options tab automatically opens. The Table and the Attribute sections are already filled out. The Scope field is automatically filled with all the other widgets on the slide.
Select the Loan value in the Filter drop down menu.
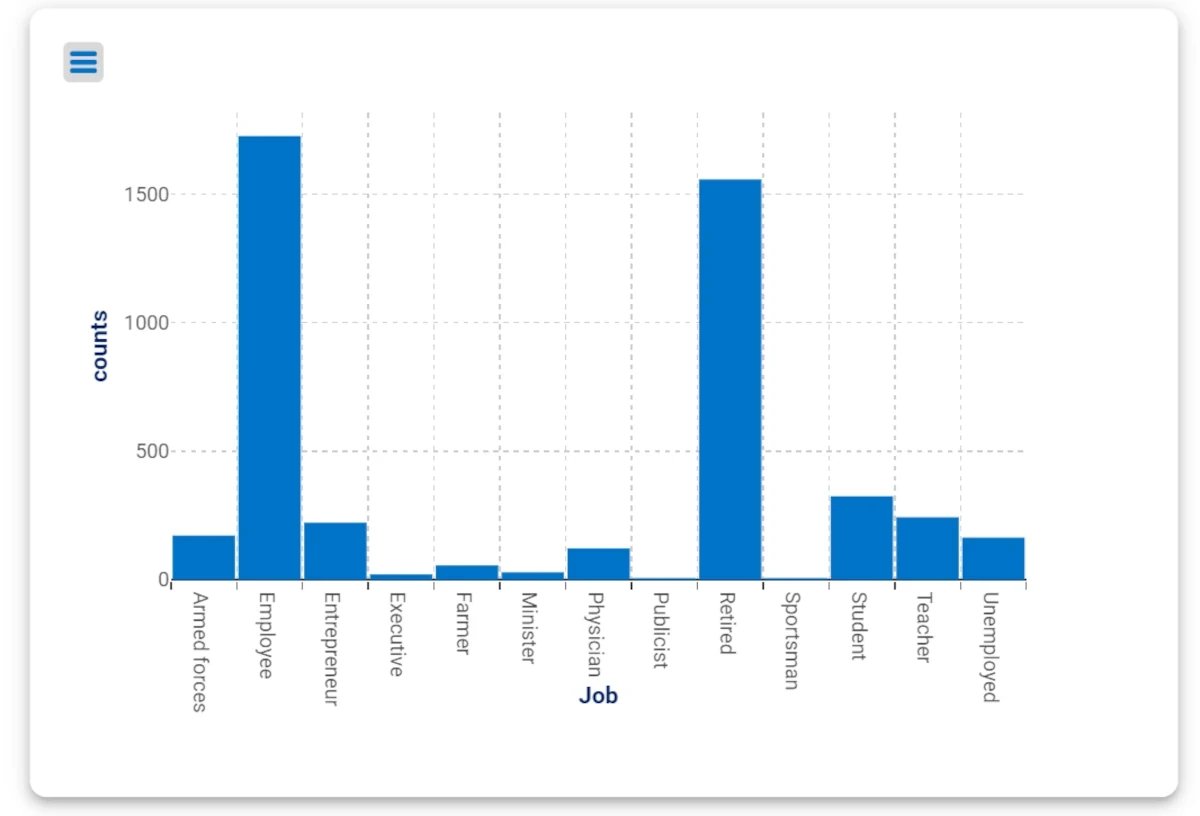
Once the filter has been applied, both plots will show a graphical representation of data according to the filter. This behavior happened because the filter which has been created on the Product attribute of the Transactions dataset has been applied to all attributes within the dataset itself but, as the Id attribute is present also in the Clients_data dataset, it has been propagated to the Id attribute in the Clients_data dataset and to all the other attributes within the dataset.
As you can see, the first plot will show the loan data based on the job of the subjects, while the second plot will show the loan data based on its value.
Controls
Controls are a type of widget in Rulex Studio, found in the Widgets panel of the stage.
Differently from the Actions, the Controls widgets do not own a pre-determinate operation triggered at state change.
Therefore, to harness the full potential of these widgets, Controls need to be associated with events.
There are two types of Controls widgets:
Each type of widget has its own set of configuration options. In the following subsections, users will find detailed information about how to configure the standard Button widget.
As for the configuration of the Toolbar, here’s the dedicated page.
General Button
The General button widget has the graphical aspect of a button. To use this widget correctly, it must be linked to an event associated to its onClick trigger.
The table below provides a detailed description of the General button layout options along with their corresponding GOLD references. These options can also be modified using parametric mode.
Subsection |
Option |
Description |
GOLD Ref |
|---|---|---|---|
Button |
Button variant |
This drop-down list defines the button’s graphical style. Available options include: Contained, Outlined, Text. |
|
Disable button |
By selecting this checkbox, the button will be immediately disabled, causing it to appear greyed out and preventing any user interaction. |
||
Disable hover effect |
By selecting this checkbox, the button’s hover effect will be disabled. |
||
Title |
Text style |
Here, users can define the title style, which can be bold, italic or underlined. |
|
Title text |
In this text field, users can define the text appearing onto the General button widget. |
||
Font family |
It defines the text font of the General button. Users can select the desired one in the drop-down menu. |
||
Text transform |
From this drop-down list, the text appearing on the widget can be customized. Available options include: None, Capitalize, Uppercase, Lowercase. |
||
Font size (px) |
In this spin-box, users can choose the desired font size in pixels of their button’s text. |
||
Title color |
This option defines the button’s title color. By clicking it, users can select Standard colors and generated color palettes, otherwise they can use the color picker or choose the color code, which can be: Hex, Rgb, Hsl, Hsv. The default color is dark blue. |
||
Title color hover |
This option defines the title text color that will appear when hovering over the General button. By clicking it, users can select Standard colors and generated color palettes, otherwise they can use the color picker or choose the color code, which can be: Hex, Rgb, Hsl, Hsv. The default color is light blue. |
||
Icon |
Change icon |
It adds an icon to the button. By clicking on it, users can select the desired one in the corresponding Select icons window. |
|
Icon position |
From this drop-down list, users can choose where to position the icon in relation to the button’s text. Available options are: Right and Left. |
||
Icon width (px) |
From this spin-box, users can customize their icon’s width in pixels. |
||
Icon height (px) |
From this spin-box, users can customize their icon’s height in pixels. |
||
Color |
Color |
This option defines the color of the General button. By clicking it, users can select Standard colors and generated color palettes, otherwise they can use the color picker or choose the color code, which can be: Hex, Rgb, Hsl, Hsv. The default color is light blue. |
|
Color hover |
This option defines the button’s color when users hover over it. By clicking it, users can select Standard colors and generated color palettes, otherwise they can use the color picker or choose the color code, which can be: Hex, Rgb, Hsl, Hsv. The default color is dark blue. |
||
Border |
Border radius (px) |
This spin-box allows users to set the button’s corner radius by specifying a value in pixels. The higher the number, the more rounded the button’s corners will appear. |
|
Border size (px) |
It controls the thickness of a button’s border by specifying a value in pixels. The higher the number, the thicker the border will appear. This option is only applicable when the Button variant option is set to Outlined. |
||
Label |
Text style and alignment |
Here, users can define the label style, which can be bold, italic or underlined, as well as the label horizontal alignment, which can be right, center, left. |
|
Label placement |
From this drop-down list, the placement of the button’s text label can be chosen. Available options include: Top, End, Bottom, Start. |
||
Label text |
In this text field, users can enter the label appearing on the outside of the General button. |
||
Font family |
It defines the font of the button’s text label. Users can select the desired one in the drop-down menu. |
||
Text transform |
From this drop-down list, users can further customize the button’s text label. Available options include: None, Capitalize, Uppercase, Lowercase. |
||
Font size (px) |
In this spin box, users can choose the desired font size in pixels of their button’s text label. |
||
Label color |
It defines the color of the button’s text label. By clicking it, users can select Standard colors and generated color palettes, otherwise they can use the color picker or choose the color code, which can be: Hex, Rgb, Hsl, Hsv. The default color is dark blue. |
Tip
It is also possible to define the size of the button label by clicking the three dotted icon in the top-left corner of the General button. The available options are: S (Small), M (Medium) or L (Large).
GOLD References
Here is the description of the GOLD class Action:
- class studio.action.Action(label, layout=None, data=None, id=None)
GOLD class for Studio widget family Action. Inherits from BaseWidget class. Description of Action field layout is contained in this page according to the different Action type. The action type is store into layout.options.type.
- Property visual:
field for management of virtualized lists
- Property indrow:
filter or selection generated by this action
- baseSet(label, dict_layout, data=None)
Base function to modify the widget layout
- Parameters:
label (text) – the name of the widget
dict_layout (dict) – the layout of the widget to be set
data (list) – eventually the output of the widget to be set, defaults to None
- disable()
Function to disable an Action.
- execute(dataset, dashboard=None, oldattributes=None, **params)
Function to execute an Action and evaluate the indrow it generates
- Parameters:
dataset (Dataset) – the Dataset instance to be used in generation
dashboard (Dashboard) – the Dashboard instance the Action eventually belongs to (not used in current exposed Actions), defaults to None
oldattributes (vector of text type) – attributes to be reverted back to a saved backup before computing the action (not used in current exposed Actions), defaults to None
params (dict) – eventual additional information provided for Action evaluation
- get(asdict=True)
Function to get information about an Action
- Parameters:
asdict (binary) – if True result is returned as GOLD dictionary otherwise as JSON string, defaults to True
dataset (Dataset) – the Dataset instance used in the Action evaluation
indrow (list) – the indrow applied on the action
- Returns:
a GOLD dictionary or JSON string representation of the field layout following template presented there.
- Return type:
dict or text
- getScope()
Function to return the scope of the Action
- Returns:
vector of labels of widgets this Action acts on
- Return type:
vector of text type
- hasDefaultSelected()
Function to state if the Action is at its default
- Returns:
True if it is in its default state, False otherwise
- Return type:
binary
- refresh()
Base function to refresh the widget layout, meaning re-evaluate its options according to a modification of data or variables
- rename(newname)
Base function to rename a widget
- Parameters:
newname (text) – the new name of the widget
- resetValue()
Function to reset the Action. This is done by modifying the key value inside the data dictionary
- set(label, dict_layout, data=None)
Function to modify the Action layout
- Parameters:
label (text) – the name of the Action to be modified
dict_layout (text or dict) – the new layout expressed as a JSON string or as a GOLD dictionary
dataset (Dataset) – the Dataset instance to be use for Action evaluation
onlyset (binary) – if True evaluation of the effect of Action modification is skipped, defaults to True
- setScope(newscope)
Function to modify the scope of the Action
- Parameters:
newscope (vector of text type) – vector of labels of widgets this Action needs to act on
- useTable(table, attributes=None)
Function to check if the action uses the specified table and attributes
- Parameters:
table (text) – the name of the table to check
attributes (list) – the list of attributes to check, defaults to None
- Returns:
True if the action uses the specified table and attributes, otherwise False
- Return type:
binary
Here is the description of the GOLD class Controls:
- class plot.control.Control(label, layout=None, data=None, id=None)
GOLD class for Studio widget family Control. Inherits from BaseWidget class. Description of Control field layout is contained in this page according to the different Control type. The action type is store into layout.options.type.
- baseSet(label, dict_layout, data=None)
Base function to modify the widget layout
- Parameters:
label (text) – the name of the widget
dict_layout (dict) – the layout of the widget to be set
data (list) – eventually the output of the widget to be set, defaults to None
- get(asdict=True)
Base function to retrieve information about a widget
- Parameters:
asdict (binary) – if True it returns the information as a GOLD dictionary, otherwise as a JSON string, defaults to True
- Returns:
the information about the widget
- Return type:
dict or text
- refresh()
Base function to refresh the widget layout, meaning re-evaluate its options according to a modification of data or variables
- rename(newname)
Base function to rename a widget
- Parameters:
newname (text) – the new name of the widget
- set(label, dict_layout)
Function to modify the Control layout
- Parameters:
label (text) – the name of the Control to be modified
dict_layout (text or dict) – the new layout expressed as a JSON string or as a GOLD dictionary
- useTable(table, attributes=None)
Function to check if the control uses the specified table and attributes
- Parameters:
table (text) – the name of the table to check
attributes (list) – the list of attributes to check, defaults to None
- Returns:
True if the control uses the specified table and attributes, otherwise False
- Return type:
binary