Export to Database
Users can export datasets or other data structures to a database using the Export to Database task.
The Export to Database task is divided into two tabs:
the Options Tab, and
the Advanced Tab.
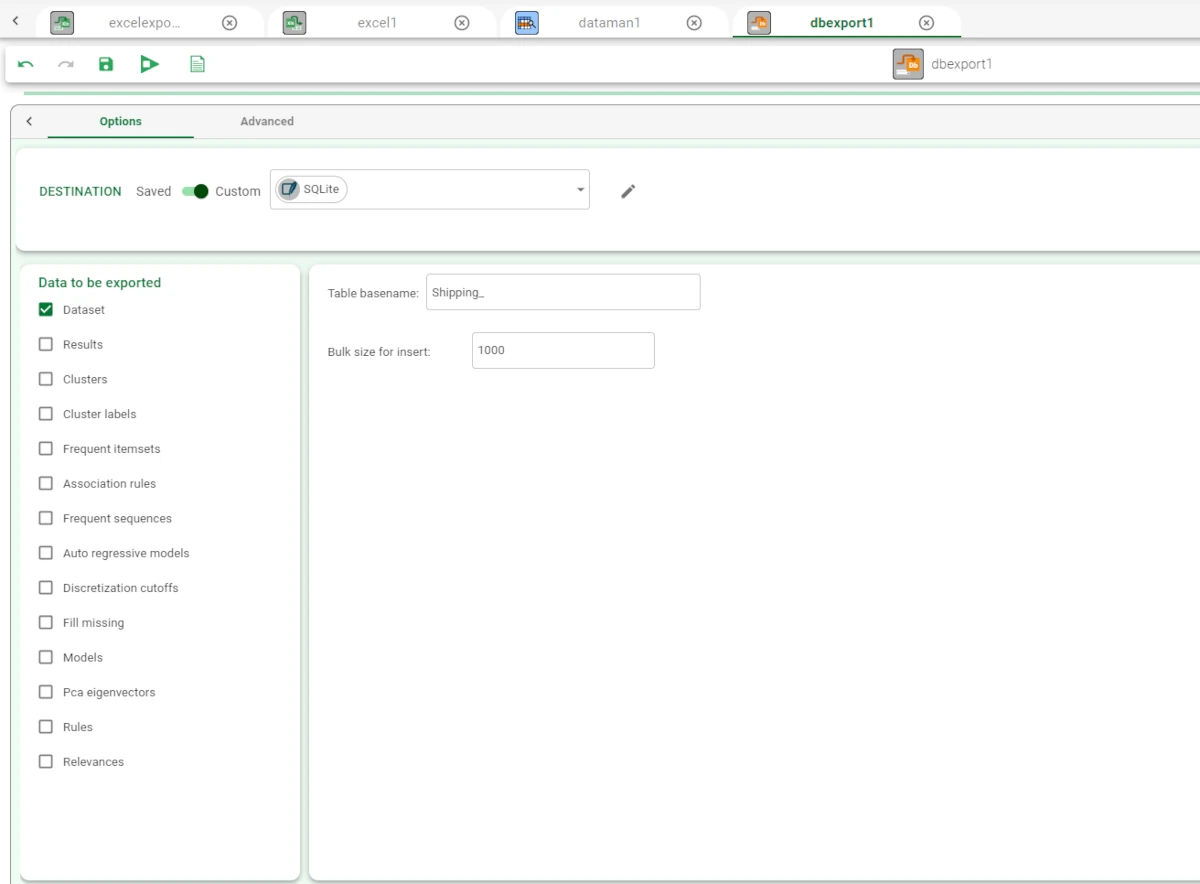
The Options Tab
In this task, the Options tab is made of three areas:
the Destination controller,
the Data to be exported list, and
the Table options
Destination controller
In the Destination controller, users can choose if they want to store the exported data to a Saved or to a Custom resource.
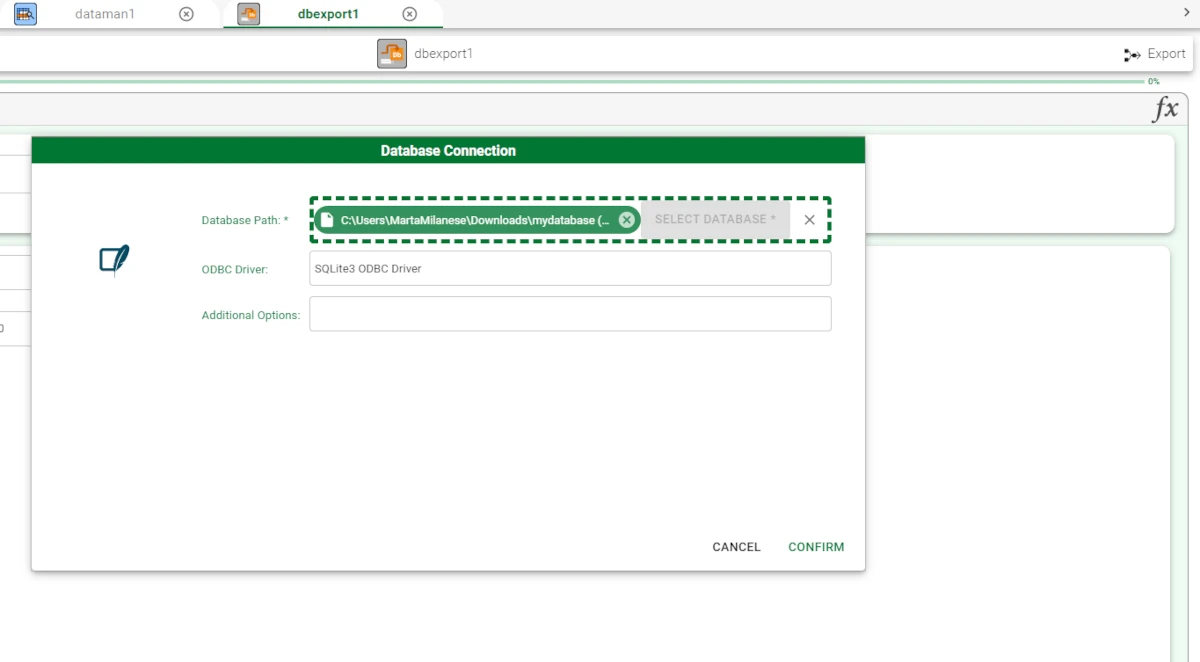
If a Custom resource has been chosen, choose the database type in the drop-down list located next to the Custom label. Then, click on the pencil button to add the database details.
To know more about the supported databases in Rulex Factory and how to configure them, go to the corresponding page.
Data to be exported
The Data to be exported list, as said in the introductory page, provides a full list of the data structures available for the export operation.
See the corresponding page for further information on each data type.
Table options
The table options area contains the following settings:
Table basename: type the name for the exported database table.
Bulk size for insert: specify the size of the retrieved data blocks. Its default value is 1,000.
The Advanced tab
In the Advanced tab, users can find all the options to customize the way the dataset table is created with the export operation.
It is divided into four areas:
the Available attributes area, where all the attributes available to build the dataset table are listed.
the mode area, where the details on the insert mode are provided.
the Key attributes area, where the key attributes can be defined.
the Exported attributes area.
The Available attributes area
In the Available attributes area, users can visualize all the attributes available for the operations in the other areas.
In the Order by drop-down list, users can establish the order by Attribute, Name, Type, Ignored, Role.
Mode area
In the mode area, the following options can be customized:
- Insert mode: the type of export which will be performed. Possible values are:
Insert (with drop) (default)
Insert (append)
Insert (with truncate)
Update
Insert/Update
Delete
Add increment primary key: if selected, a column is added to the exported table with an incremental number as primary key.
Use also missing values in conditions on key variables: if selected, the missing values in the key attributes in the dataset will lead to conditions on NULL, while if it is not selected, any missing value will lead to ignore the full row in the conditions’ construction.
Use input rules to determine conditions: if selected, input rules are used to determine query conditions instead of key attribute values.
Key attributes
In the Key attributes drop-down area, the list of the attributes the users want to use as keys to filter the imported results can be created.
Instead of manually dragging and dropping attributes, they can be defined via a filtered list.
Exported attributes (all if left empty)
In the Exported attributes (all if left empty) area, users can drag the list of the attributes to be exported.
If this list is left empty, all the attributes in the Available attributes list will be exported.
Instead of manually dragging and dropping attributes, they can be defined via a filtered list.
Example
Drag an Export to Database task onto the stage and connect to a Data Manager.
Configure its access parameters, as explained in the Database Resources.
Select the file location of the downloaded file.
Select what you want to export in the Data to be exported pane and type a name for the new table in the Table basename text box. Save and compute the task.