Export to PDF File
The Export to PDF File task exports datasets or other data structures to a PDF file.
The Export to PDF File task is divided into two tabs:
the Options Tab,
the Export Options Tab.
The Options tab
A detailed description of the Options tab is provided in the Export tasks introductory page.
The Export Options tab
The Export Options tab is made of only one pane, the Dataset structure one.
Dataset structure
In this pane, the following options are available:
- Data separator: users can select the data separator which delimits the values of the data to be exported in the output text file. Possible values are:
TABBING
COMMA
SEMICOLON
SPACE
Other (any other separator can be specified)
Put names in line (0 means ‘no names’): the line number from which the names of the columns will be taken. Its default value is 1.
Put types in line (o means ‘no types): the line number from which the names of the data types will be taken. Its default value is 0.
Missing string: the character (or string) used to indicate missing values.
Text delimiter: select from the drop-down list the symbol used to identify strings, which will included in the exported file (e.g. selecting the symbol “, the string age will be exported as “age”).
Example
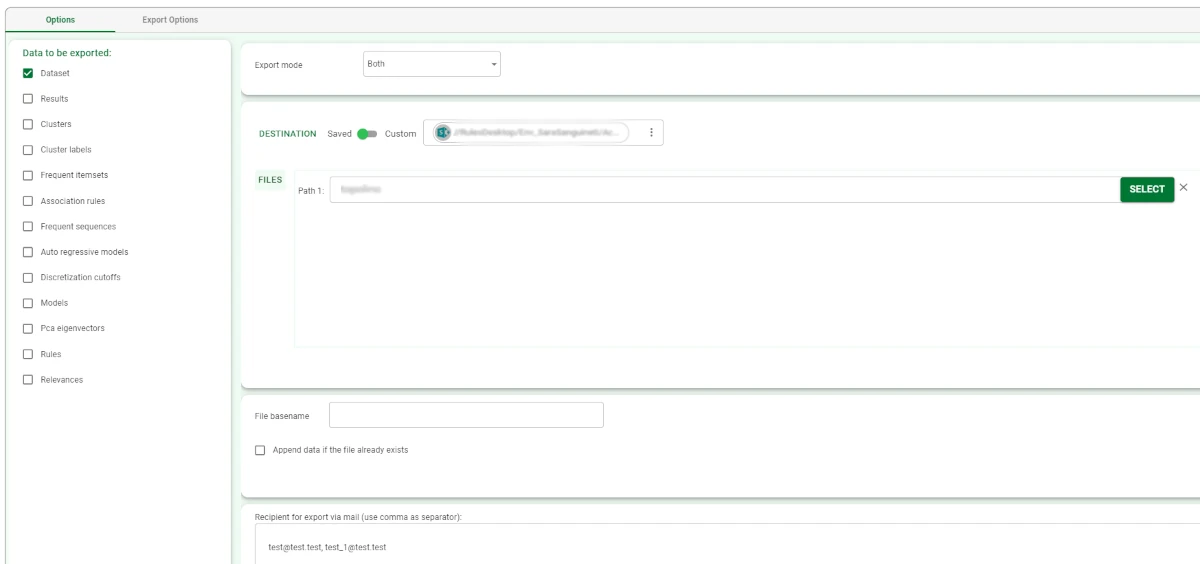
Drag an Export to PDF File task onto the stage and link it to the task containing the data to export.
- Double-click the task to open it and configure it as follows:
Select Dataset as the Data to be exported.
Select Both as the Export mode.
Select the Destination type: in this case, we decided to use a Saved destination, a Sharepoint connection.
Choose the path of the folder where the file will be stored by clicking on the SELECT button.
Write the File basename in the corresponding field.
Type the email addresses to which you want to send the exported file by typing them in the Recipients for export via email field.