Import from Text File
The Import from Text File task makes possible importing directly data from a text file.
The Import from Text File task is divided into two tabs:
The Options tab
The Options tab follows the structure shown in the Import Overview page.
The Text Configuration tab
The Text Configuration tab is divided into three panes:
Parsing options: users can find the parsing options.
Import options: users can find the import options.
Table preview: users can visualize a preview of their imported tables.
Parsing options
Within this pane, users can set and configure the following options:
Data separators: it delimits the values of the data to be imported. Users can select one of the following options:
TABBING
COMMA
SEMICOLON
SPACE
Other
Number separators: users can define symbols to mark thousands and decimals in numbers. You can select the symbols from the Thousands and Decimals drop-down lists.
Missing string: user can enter the string they want to remove from the dataset.
Text delimiter: select ‘ or “ if these symbols have been used as string delimiters. They will not be included in the imported file. For example, the string “apartment” will be imported as apartment. This option will remove all instances of text delimiters in the string, and not only the initial and closing symbols. The only exception to this rule will be if the symbol is proceeded by a backslash. For example, “ad"cb” will be imported as ad”cb, while “ad”cb” will be imported as adcb. The data type for values with string delimiters is nominal, and this data type will not be altered by the removal of text delimiters. For example, “3” will be imported as 3, but will remain a nominal value, instead of being converted to an integer.
Use contiguous separators as a single one: if selected, it forces the parser to consider any possible group of adjacent separators as one. For example, if you select this option, the string ‘1,2,,,3’, with the comma as a separator, will be parsed as 1, 2, 3, while if not checked it will be parsed as 1, 2, ‘’, ‘’, 3.
Character encoding for input file: it allows the user to select the character encoding from a drop-down list. Available values are:
UNICODE
UTF-16LE
UTF-16BE
ASCII default
HTML
Import options
Within this pane, users can set the following options:
Start importing from line: the number of the line from which the importing operations will start.
Stop importing at line (0 means all): the number of the line where the importing operations will end. Leave the value 0 if you want the whole dataset to be imported.
Get names from line: the number of the line from which the names of the columns will be taken.
Get types from line: the number of the line from which the data types will be taken.
Column to be imported (empty for all): the number of columns to be imported. If left empty, all the columns will be imported.
Remove empty rows: if selected, it removes the empty rows from the imported dataset.
Add an attribute containing filename: if selected, it adds an extra column with the name of the file to the dataset.
Strip spaces: if selected, it removes the empty columns from the imported dataset. For example, the string “ class “ will be imported as “class”.
Case sensitive: if selected, upper cases are considered different from lower cases.
Compress white spaces: if selected, it compresses contiguous occurrences of white spaces in one single occurrence. For example the string “university program” would be imported as “university program”.
Turn off smart type recognition: if selected, prevents automatic recognition of data types. This option is useful when manual identification is preferable, for example when there is the risk of a code being misinterpreted as a date.
Remove empty columns: if selected, it removes the empty columns from the imported dataset.
Example
Drag an Import from Text File task onto the stage.
Double-click the task to open it.
Move the Source slider to Custom.
Select Local File System from the drop-down menu.
Click Select and browse to the file you want to import.
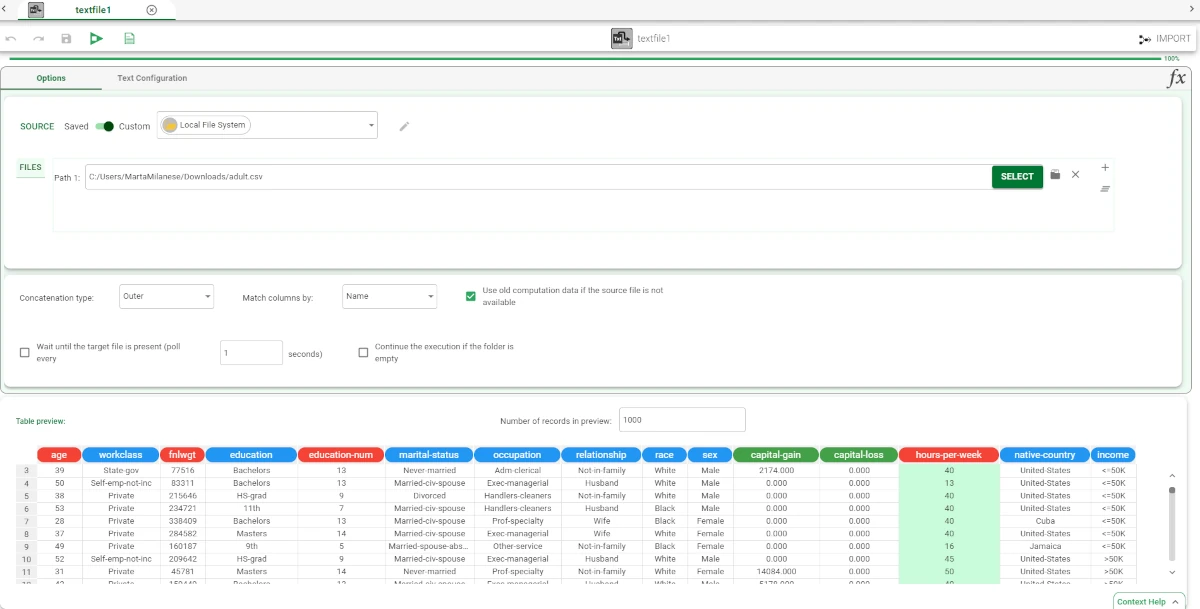
Configure the selected task as explained above, and if needed, change its configuration in the Text Configuration tab.
According to the selected text file, your Import from Text File task should look like the example provided below.