Slides and Dialogs
Slides and dialogs are two essential visual components of Rulex Studio, enabling users to customize and manage their views efficiently. To access and tailor slides and dialogs to their needs, users need to select their respective tabs located in the stage left panel. Down below the major features and functions of both slides and dialogs are delineated:
Slide: displays a blank canvas at the center of the stage window with pre-set dimensions for width and height. While these dimensions are initially fixed, they can be customized for each individual slide or by changing the default dimensions for all slides in the respective view.
Dialog: is a slide within a floating window, where users set its dimensions each time they create a new one. When adding a new dialog, a window prompts users to specify their preferred height and width.
In editing mode, when users select the Dialogs tab, they can see and directly modify their dialogs as needed. However, dialogs can also be viewed in read-only mode when triggered by Open modal window event type. In presentation mode, dialogs triggered by this event are always displayed in read-only mode.
Interactions in Slides and Dialogs Panels
Rulex Studio offers a variety of interactions within the Slides and Dialogs panels. While the widget interactions are shared between these two features, their respective context menus display unique operations targeted to the precise component they refer to.
By right-clicking any entry of the slides and dialogs list, a dedicated context menu appears, showing a list of possible operations on the selected slide or dialog. In particular, the context menu contains the following entries:
Copy: it copies the selected slide or dialog.
Duplicate: it duplicates the selected slide or dialog.
Make dialog/slide: it converts a slide into a dialog, or a dialog into a slide.
Open slide/dialog layout: for slides, it opens the Slide layout preferences window, where users can set the layout preferences of their slides. For dialogs, it opens the Dialog layout preferences window, allowing users to configure layout options for dialogs.
Rename: it renames the selected slide or dialog.
Export slide/dialog: it exports the selected slide or dialog as a PNG file to the desired folder on your local system.
Delete: it deletes the selected slide or dialog.
Widget Interactions
The widget interactions available in Rulex Studio’s Slides and Dialogs panels are identical. To reach the shared list of operations for widgets, users need to click the expand icon next to the corresponding slide or dialog. This will display a list of all available widgets within the selected slide or dialog.
By right-clicking on any widget in this list, users can access to a range of stage operations for widgets. This context menu includes the following options:
Open widget layout: it opens the widget layout window for the selected widget. More information on configuring this window and its structure can be found on the corresponding widget’s page.
Set events: it allows users to choose from a range of trigger types for an event. More information on Events and on how to configure them can be found on the corresponding section of this manual.
Delete: it deletes the selected widget.
Example
In this step-by-step guide, it will be demonstrated how to create an interaction between a slide and a dialog within a view. Specifically, an Open modal window event will be set up on a widget in a slide and connected to a dialog that opens as a pop-up window.
After importing the Adult dataset into a view, select the Dialogs tab.
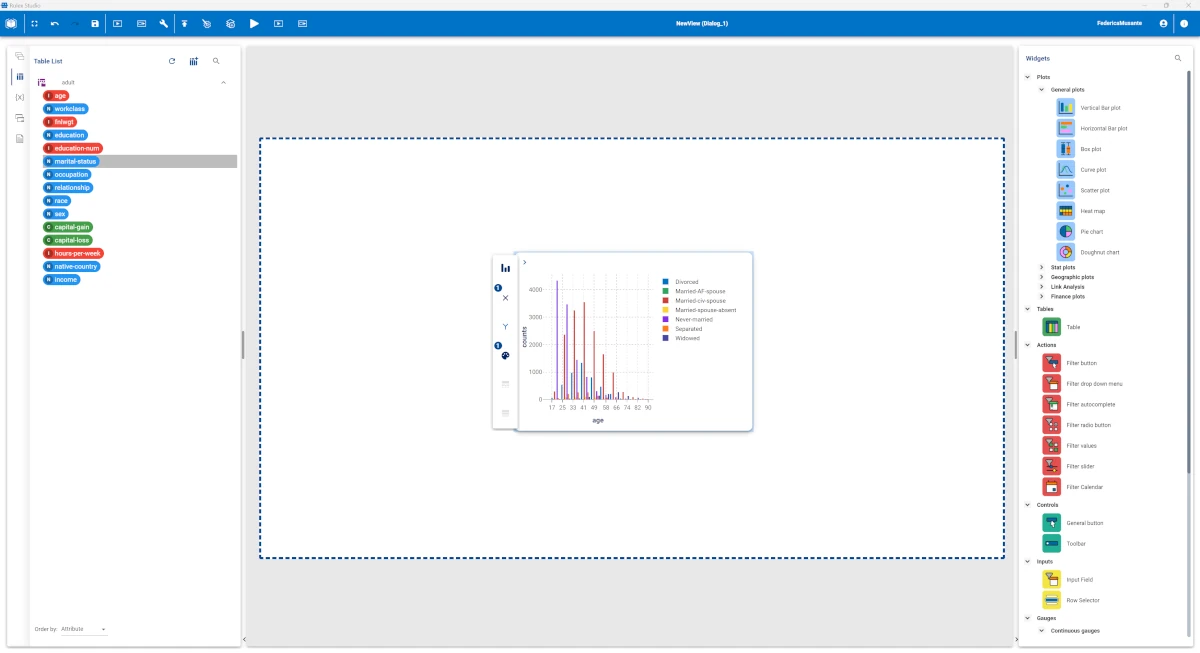
Click on the plus icon in the top-right corner of the Dialogs tab to create a new dialog in the view. When the Dialog layout preferences window appears, enter your preferred dimensions and click ADD.
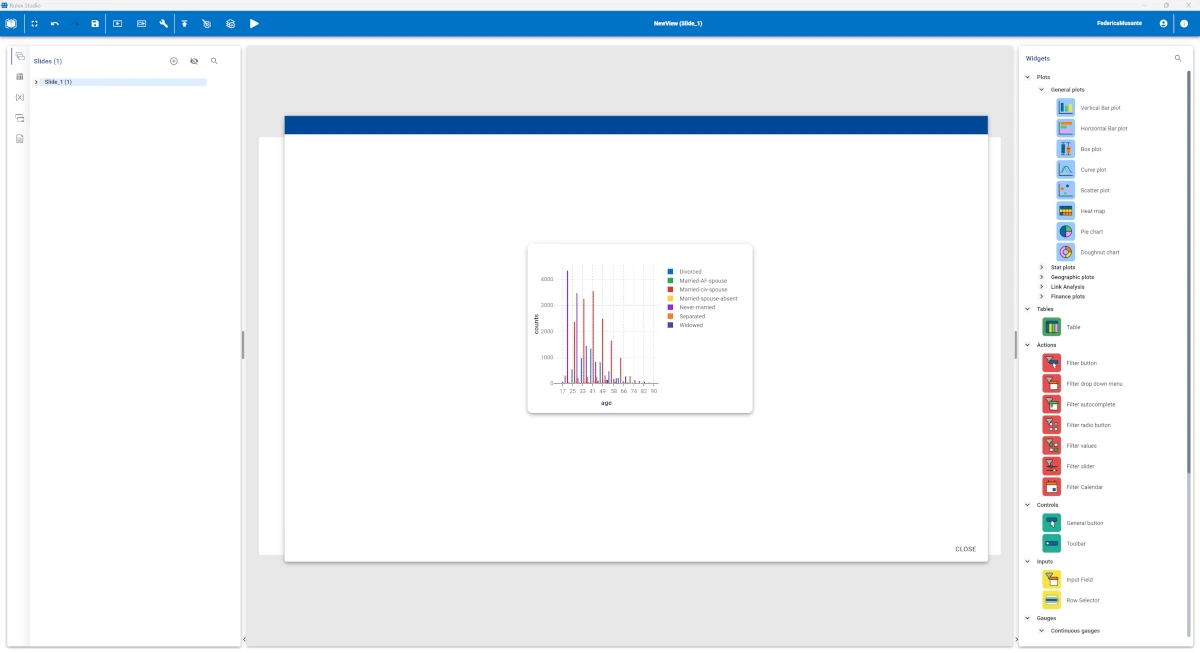
Configure a Vertical Bar chart widget as follows:
Drag the age attribute onto the X Axis icon.
Drag the marital-status attribute onto the Color Target icon.
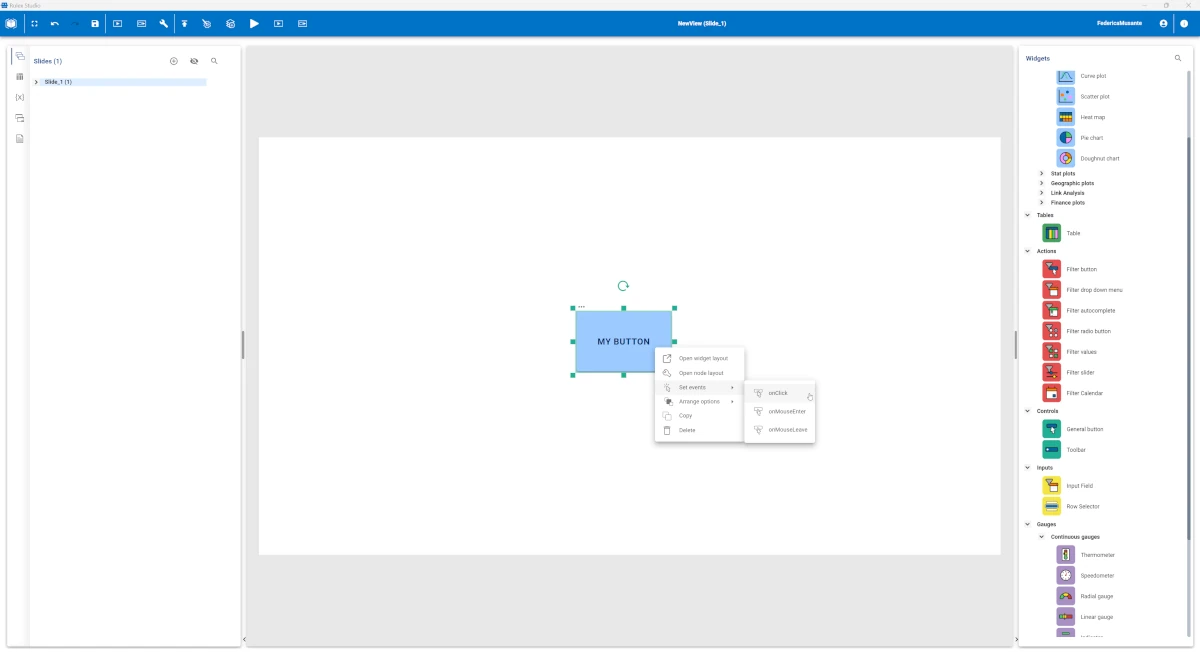
Select the Slides tab, then drag and drop a General button widget from the Controls category onto the stage.
Right-click on the button, then select the Set events option and choose the onClick trigger entry.
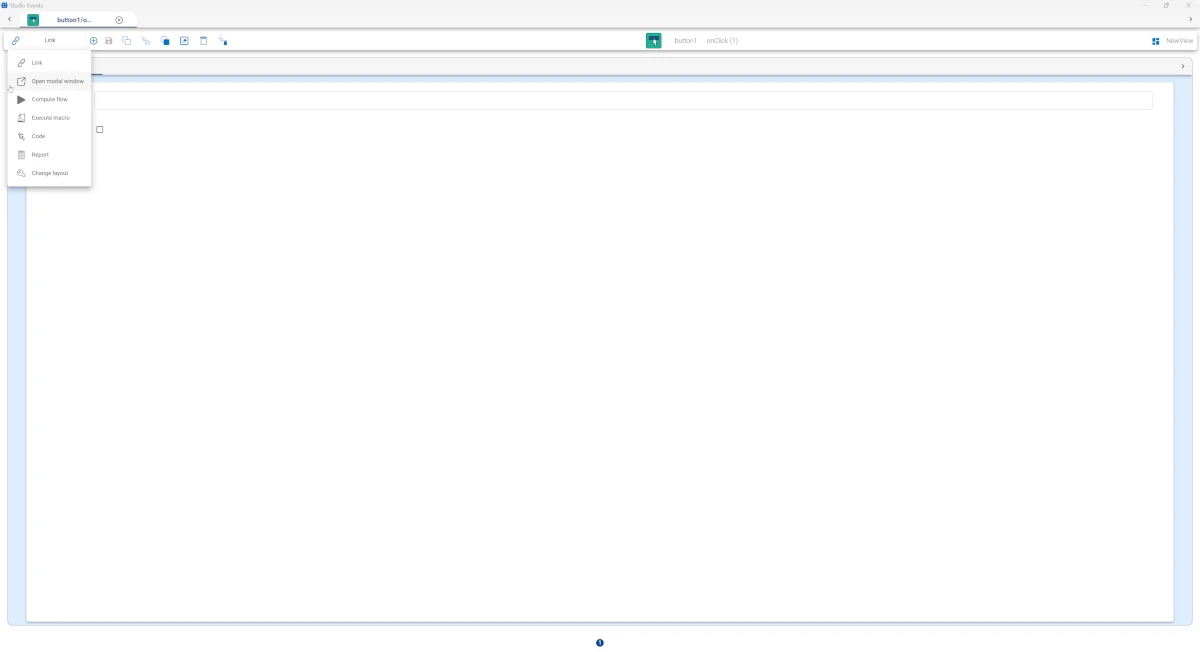
In the events tab, change the event by selecting the Open modal window event type. A pop-up will appear, informing you that all current changes will be discarded. Click YES to proceed.
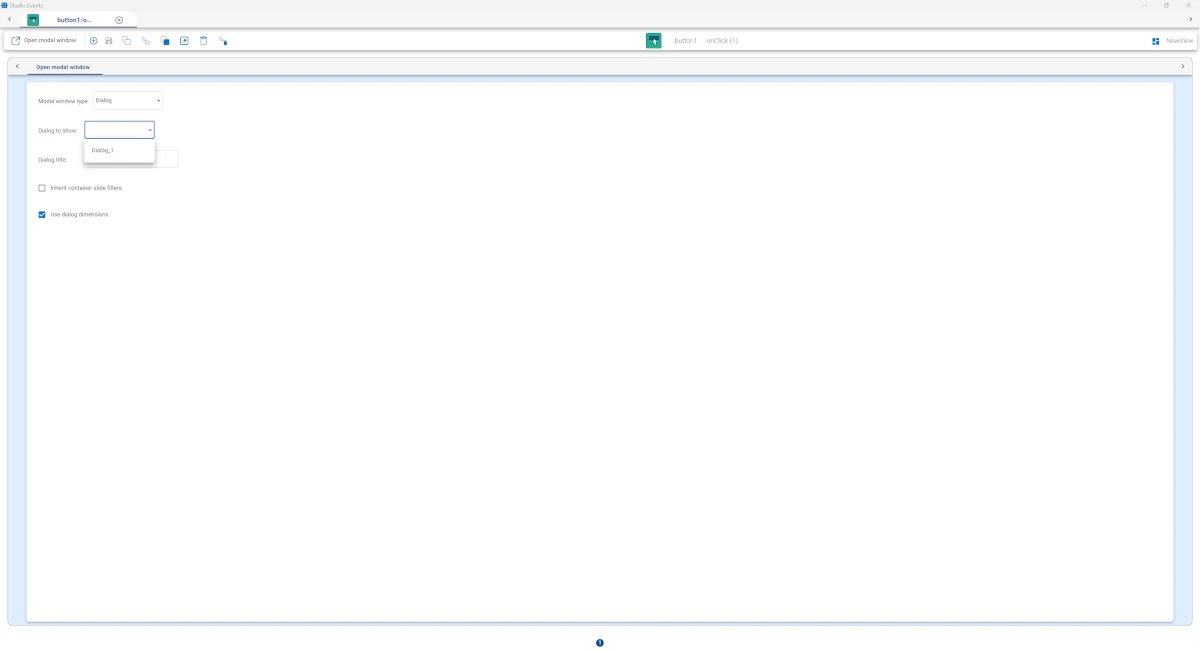
Choose Dialog_1 from the Dialog to show drop-down list.
Save the event and close the Studio Events window.
Click on the General button widget to open the dialog with the plot.
Slides and Dialogs GOLD Reference
Slides and Dialogs are based on the Dashboard GOLD class: