Configuring Rulex Platform
In every component of Rulex Platform the user settings can be found in top right-hand corner of the toolbar. This context menu allows users to change settings and preferences, that can have a direct impact on the whole experience in Rulex Platform. The user settings menu is divided into:
Manage Product Key: it displays the current Product Key value and allows the user to change it.
- Manage Settings: it opens the Settings Manager panel where the user can change the main settings of Rulex Platform. Here the following operations can be performed:
- Component Preferences: for any component here you will find layout customization options related to it.
Factory Preferences: for more information see Factory Preferences
Rest API Settings: it allows you to create REST API users to use REST API service in cloud/server environment. For more info see this page.
Role Manager: it allows you to change roles for any user in cloud/server environment.
It is possible to change Rulex Platform settings through two buttons, whose features and effects are explained below:
Sync with defaults: by clicking this button, the default settings will be restored. The modifications made to settings will be lost. After having performed this operation, a warning appears and the application is closed.
Make settings default: by clicking on this button, the modifications on settings are applied to the default ones. A warning appears to confirm this operation.
Warning
Only the Administrator can edit the options listed in the Settings Manager.
Note
Rest API Settings and Role Manager are only available in Rulex Platform Cloud/server version.
Changing the Product Key
During the installation process, a valid product key must be provided for the software to work.
The product key is your Rulex Platform license, and it is an encrypted alphanumerical code which defines:
the Rulex Platform’s components included
the license type purchased
the number of simultaneous Rulex Platform sessions that can be run using the same product key.
The product key can then be managed in the Product Key Manager, and the administrators are the only ones allowed to do so.
Procedure
Open the Product Key Manager dialog box by clicking on the user logo icon in the top right-hand corner of your screen.
Select Manage Product Key.
Write the product key in the text boxes, providing five digits in each box.
Click Confirm.
Configuring the main working area
Warning
This operation is only available in the Factory Enterprise license.
Rulex Platform requires a physical working area to work, which is located in the folders of the machine where the software is installed. In this working area one or more Rulex Working Database will be automatically created.
Rulex Working Database is a proprietary NoSQL Database optimized for Rulex software operations. The whole system of resource authorization (for more information see Resources and Permissions) is stored in the working resource folder while each component owns its internal working folder.
Note
It is strongly recommended to keep the resource folder and each component folder aligned, so that the connection among all resources won’t be lost. Please consider using different folders only in case of specific needs.
This panel is accessible in every component of the Platform, so you will always be able to change the resource folder.
Procedure
Open the Settings Manager dialog box by clicking on the user logo icon in the top right-hand corner of your screen.
Select Manage settings.
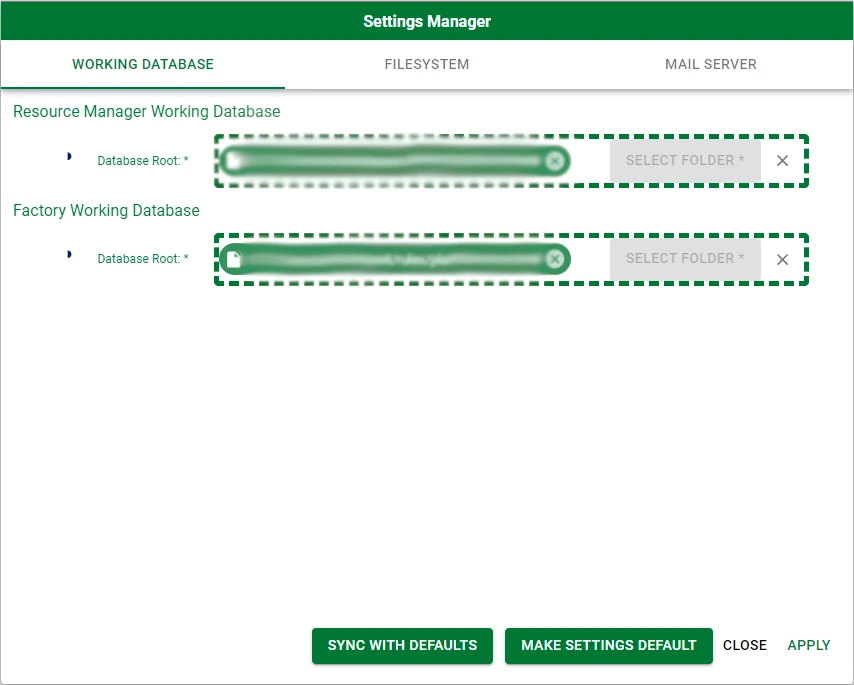
Select the Working Database tab.
In the Resource Manager Working Database section, click on the Select Folder button to choose the path where the grouped files are located.
Repeat the same operation in the <Component> Working Database section.
Click Apply to save the changes, otherwise click Close. If the edit operation is successful, you will be logged out and brought to the Rulex Platform’s homepage.
Configuring the caching location and retention policies
During its activity Rulex Platform needs to store file information in caching locations for the next use. These caching locations are:
Cache: it is where Rulex Platform’s temporary items are stored. it usually contains various files referring to operations happened in a short timeframe (e.g.:importing a flow from a remote filesystem). The default retention time is 2 days.
Local: this folder contains server-side files uploaded from the client into the cloud/server application or uploaded via an automatic API/CLI call. By default, there is no expiration date for this folder.
Log: the files recording all the operations performed on the software, divided on a monthly basis. The default retention time is 3 months.
Temp: it contains all the temporary files related to the software, and by default it matches with the machine’s temp folder. The default retention time is 2 days.
Versioning: this folder contains all the local git repo needed for any versioning operation. By default, there is no expiration date.
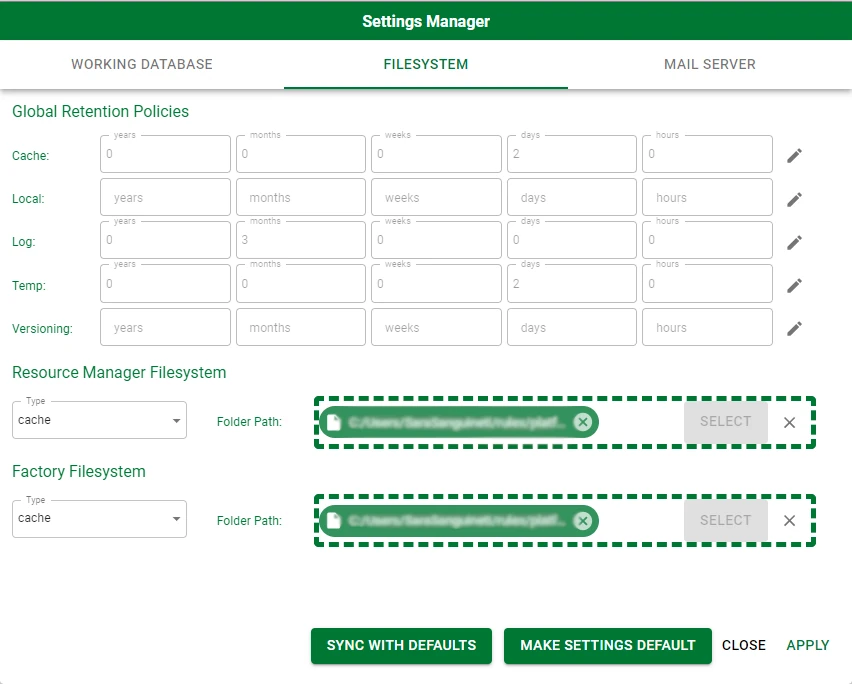
In the Settings Manager, all these entries can be configured by selecting the folder used to store the information listed and by setting the corresponding Filesystem Retention Policy. You can open this section by selecting the Filesystem tab in the Settings Manager.
Warning
Only Administrators can edit the Filesystem Policies. Moreover, the folder configuration is only available in the standalone version.
The retention policy is expressed respectively in year, month, day, hour, minutes or any combination of these time units.
Procedure
Open the Settings Manager dialog box by clicking on the user logo icon in the top right-hand corner of your screen.
Select Manage Settings.
Select the Filesystem tab.
Edit the Global Retention Policies by clicking on the pencil icon, then click on the tick once you’re done editing.
Change the Resource Manager Filesystem by deleting the current path and clicking Select to choose the new one.
Change the Component Filesystem by deleting the current path and clicking Select to choose the new one.
Click Apply to save the changes, otherwise click Close.
Configuring Rulex Platform’s mail server
Some of Rulex Platform’s operations, such as sending alerts or exporting datasets via mail require a mail server to send mails to a user-defined list of recipients.
Danger
If the Mail Server isn’t configured, you won’t receive emails from Rulex Platform related to alerts or containing exported datasets.
Warning
Only Administrators can edit the Platform Mail Server options.
Procedure
Open the Settings Manager dialog box by clicking on the user logo icon in the top right-hand corner of your screen.
Select Manage Settings.
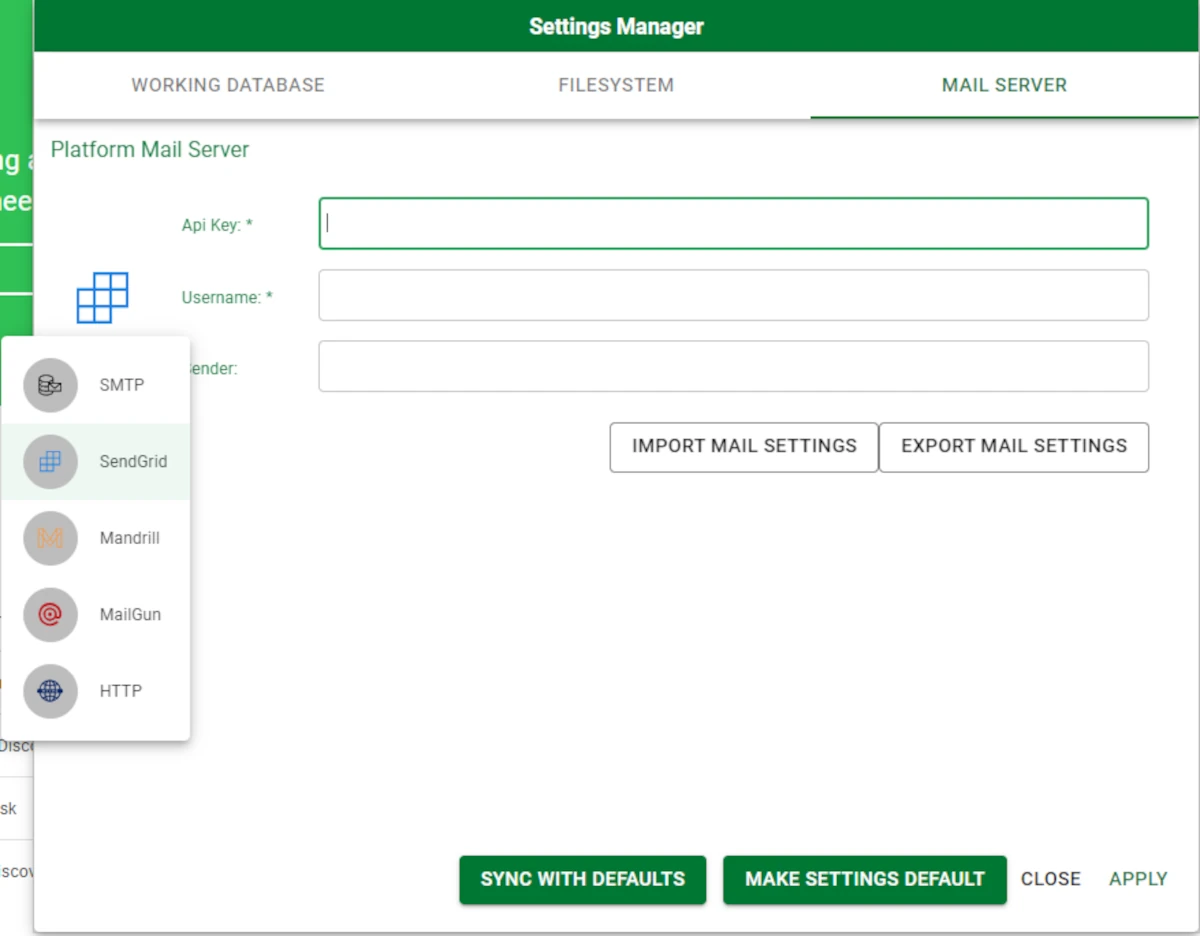
Select the Mail Server tab.
Choose the Mail Server type by clicking on the Mail Server logo located at the left of the panel.
Configure the chosen Mail Server options (for more detailed information about these forms see this guide).
Click Apply to save the changes, otherwise click Close.
Configuring roles in Rulex Platform
Warning
This entry is only available in Rulex Platform Cloud/server version
Roles in Rulex Platform enable or disable different features in the application itself and thus control the basic configuration of the entire system. For a more specific definition on roles see Rulex Platform user roles page.