Import from Excel File
The Import from Excel File task allows users to import MS Excel files, specifying the data sheet you want to import.
The Import from Excel File task is divided into two tabs:
the Options tab
The characteristics of both tabs will be explained in the next sections.
See also
The .xlsb and .xlsm MS Excel file format are supported as well.
The Options tab
The Options tab follows the structure shown in the Import Overview page. Except for an additional tab in the Location Controller pane: the Sheets tab, whose information and characteristics will be explained in this page.
The Sheets tab
The Sheets tab is divided into two panes:
The Sheet options
The Sheet name
Sheet options
Within this pane, users can set the following options:
Match sheet by position: if selected, the sheet will be imported according to its position. A numeric check boxed list, containing the imported sheets, will appear in the Sheet name pane.
Sheet import mode: through the provided drop-down list, users can select the way they want to import their selected sheets. Available values are:
Import selected sheets: if selected, all selected sheets are imported.
Import all but selected sheets: if selected, all sheets will be imported, except the selected ones, which will be excluded from the import operation.
Import all sheets: if selected, all sheets will be imported.
Sheet name
Within this pane, users will find a list of the available sheets from which they will be able to import their data. On the right-side of the pane, further available options are:
Check All Sheets: if selected, all the available sheets will be selected.
Uncheck All Sheets: if selected, all the previously selected sheets will be unselected.
Invert: if selected, the whole selection will be inverted: the selected sheets will be unselected and vice versa.
The Excel Configuration tab
The Excel Configuration tab is divided into three panes:
Parsing options: users can define the parsing options.
Import options: users can define the import options.
Table preview: users can visualize a preview of their imported tables.
Parsing options
Parsing means transforming data into a readable and standard format. Rulex Factory works out parsing options automatically from the data it imports, but you can change these settings if necessary.
Within this pane, users will find the following option:
Missing string: enter the character or string representing missing values in the dataset, for example “N/A”, “missing”. These characters will be removed from the dataset, effectively leaving an empty cell.
Import options
The Import options go into detail on how the selected files are going to be imported into Rulex Factory.
Within this pane, users can configure the following options:
Start importing from line: the number of the line from which the importing operations start.
Start importing at line (0 means all): the line number where the importing operations end. Leave the value 0 if you want the whole dataset to be imported.
Get names from line: the number of the line from which the names of the columns will be taken.
Get types from line: the number of the line from which the data types will be taken.
Column to be imported (empty for all): the number of columns to be imported. If left empty, all the columns will be imported.
Remove empty rows: if selected, it removes the empty rows from the imported dataset.
Add an attribute containing: if you select one of the available options, you’ll add an extra column to the dataset containing the name of the file, or sheet or both. Available options are:
Filename
Sheetname
Both
Remove empty columns: if selected, it removes the empty columns from the imported dataset.
Case sensitive: if selected, upper cases are considered different from lower cases.
Strip spaces: if selected, it removes leading and trailing spaces from the string. For example, the string “ class “ will be imported as “class”.
Turn off smart type recognition: if selected, prevents automatic recognition of data types. This option is useful when manual identification is preferable, for example when there is the risk of a code being misinterpreted as a date. However, if data types have been specifically defined in incoming MS Excel files, these data types will be maintained, even when the Turn off smart type recognition option has been selected.
Compress white spaces: if selected, it compresses contiguous occurrences of white spaces in one single occurrence.
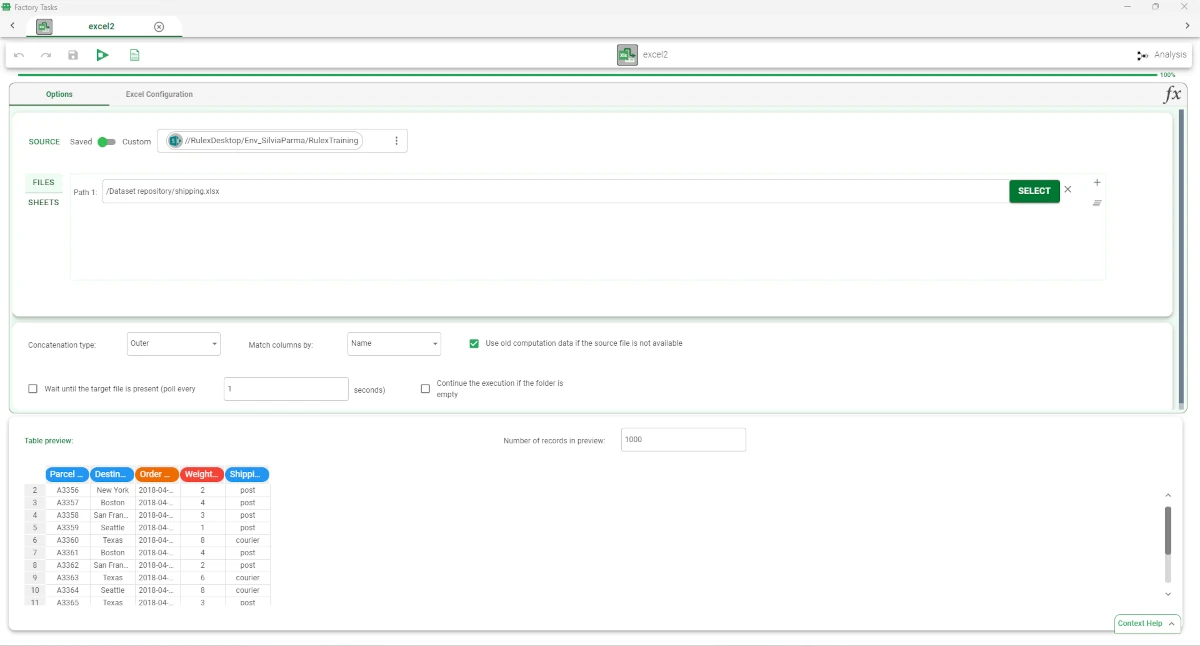
Example
Drag and drop an Import from Excel File task onto the stage.
Double-click to open the task.
Select Saved from the Source slider.
Click on the three dots, and select a saved source which has already been established.
Click Select to choose the MS Excel file to be imported.
Click Apply to complete the import process.
Select and define, if needed, the sheet and its options in the Sheets tab.
Configure, if needed, the options in the Excel Configuration tab.
Visualize a preview of the imported table in the Table preview panel.