Condition panel for nominal attributes
Anytime we want to construct a condition on a nominal or binary attribute, a dedicated condition construction panel will be presented, guiding you in condition definition.
Conditions can be constructed with three base types of comparison:
Values: the condition checks if the attributes is included in a fixed set of values.
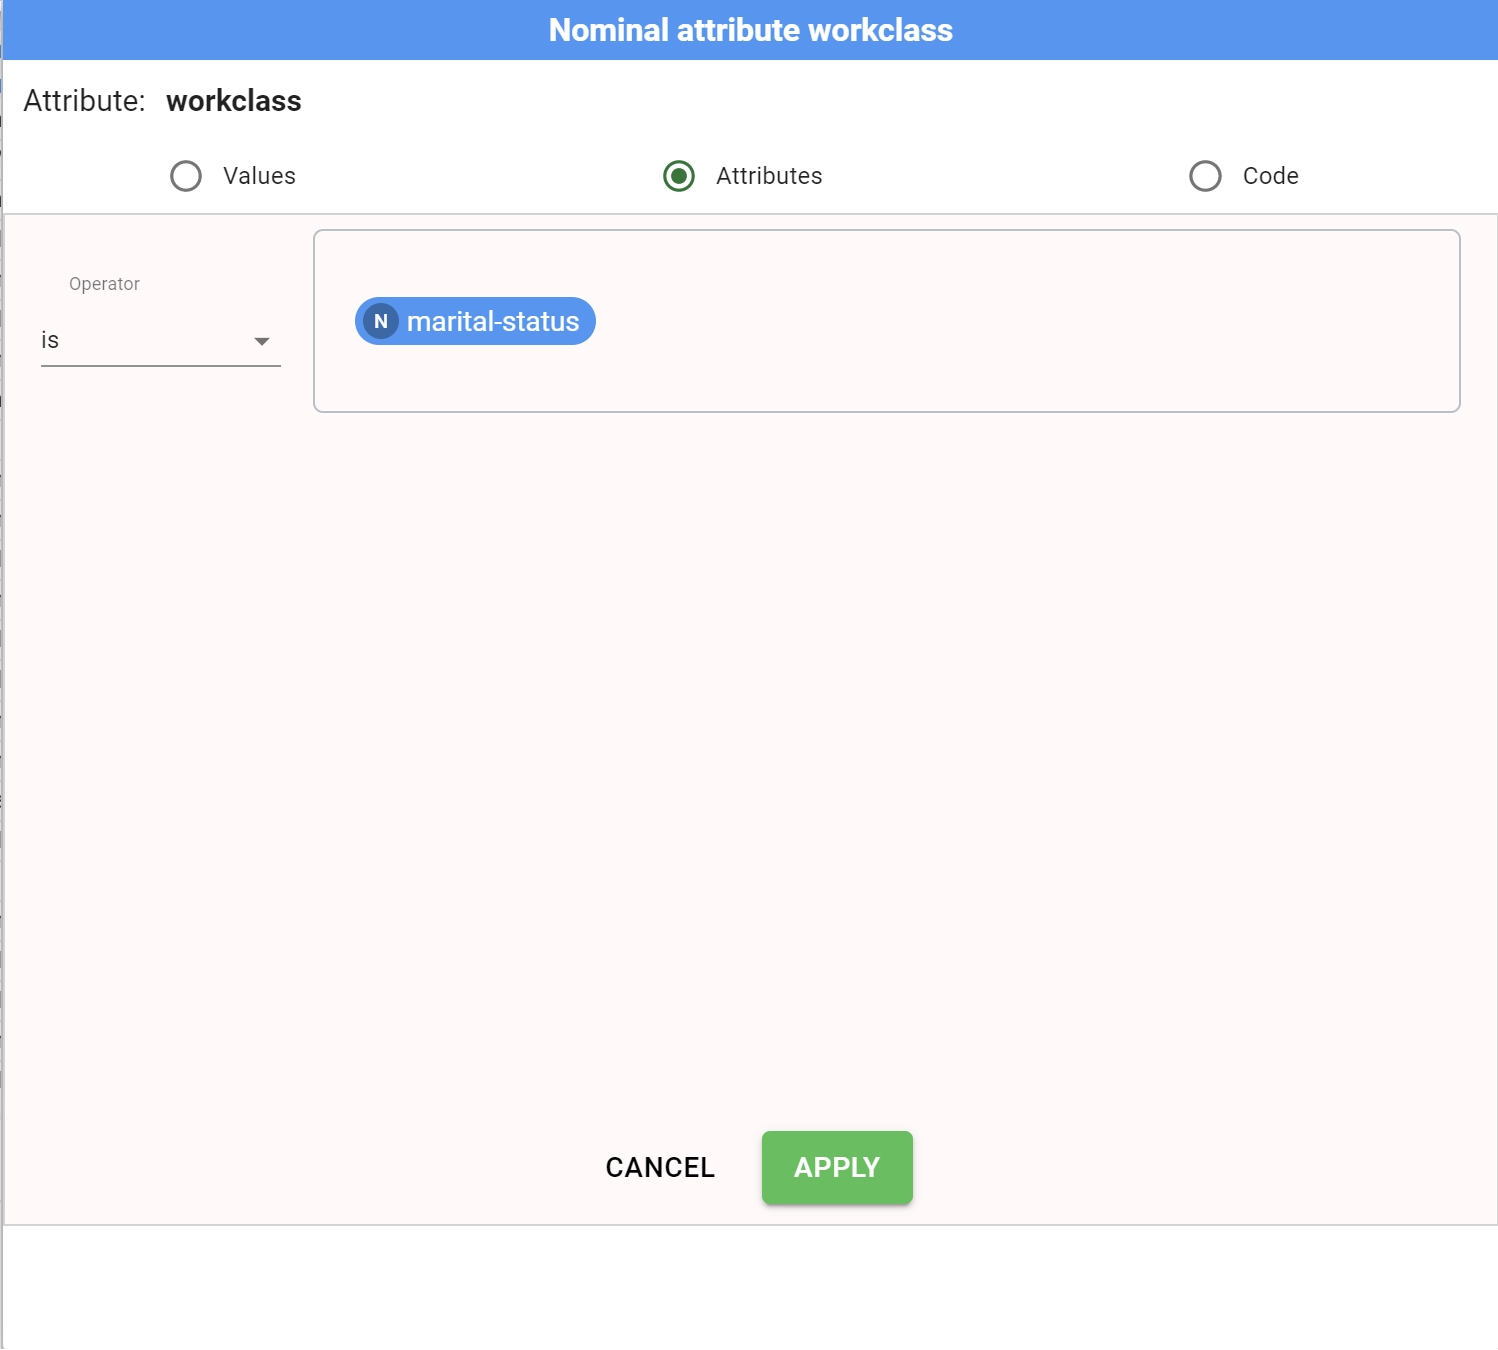
Attributes: the condition compares the attribute with other attributes. Comparison is made row by row.
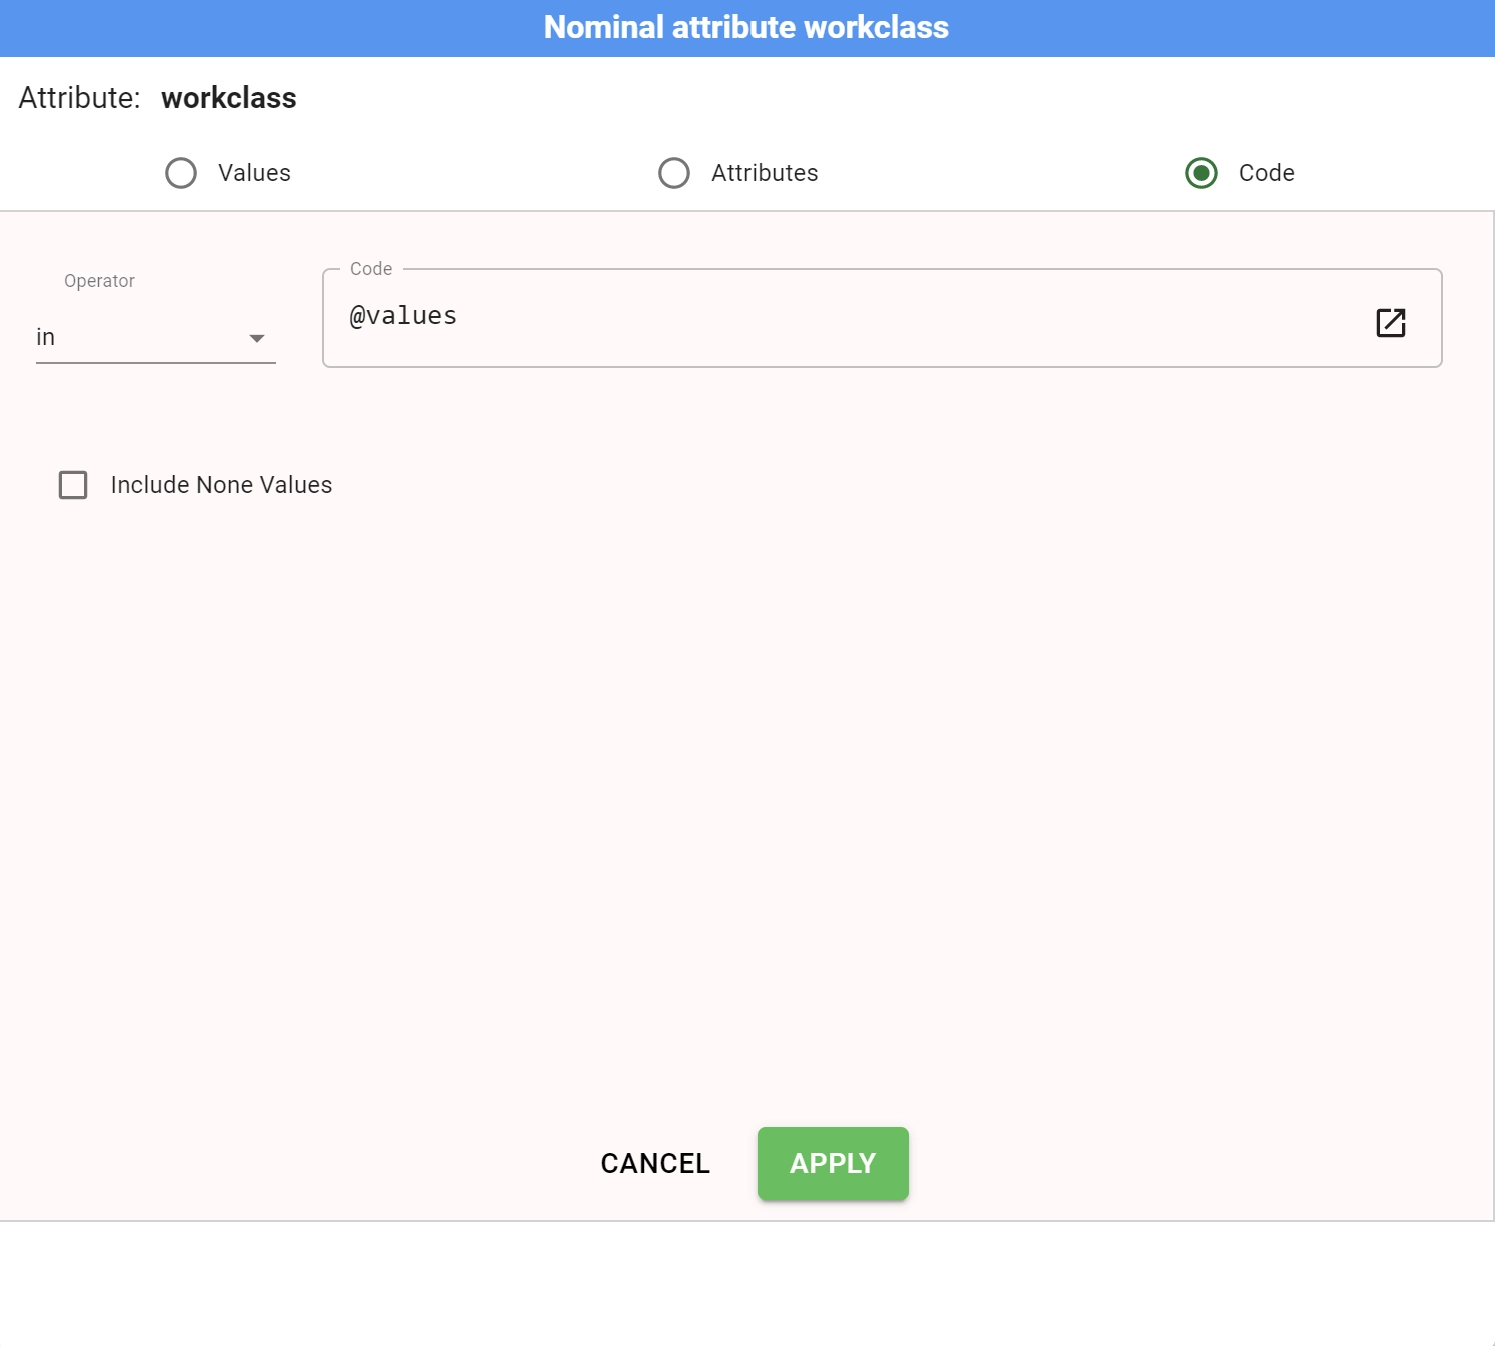
Code: the condition compares the attribute with a free GOLD code.
You can select the type of comparison you want to construct by operating on the radio button present in the upper side of the condition panel. The form of the panel below the radio button choice slightly differs with respect to the comparison type. Therefore, we are going to describe each comparison type into a dedicated section.
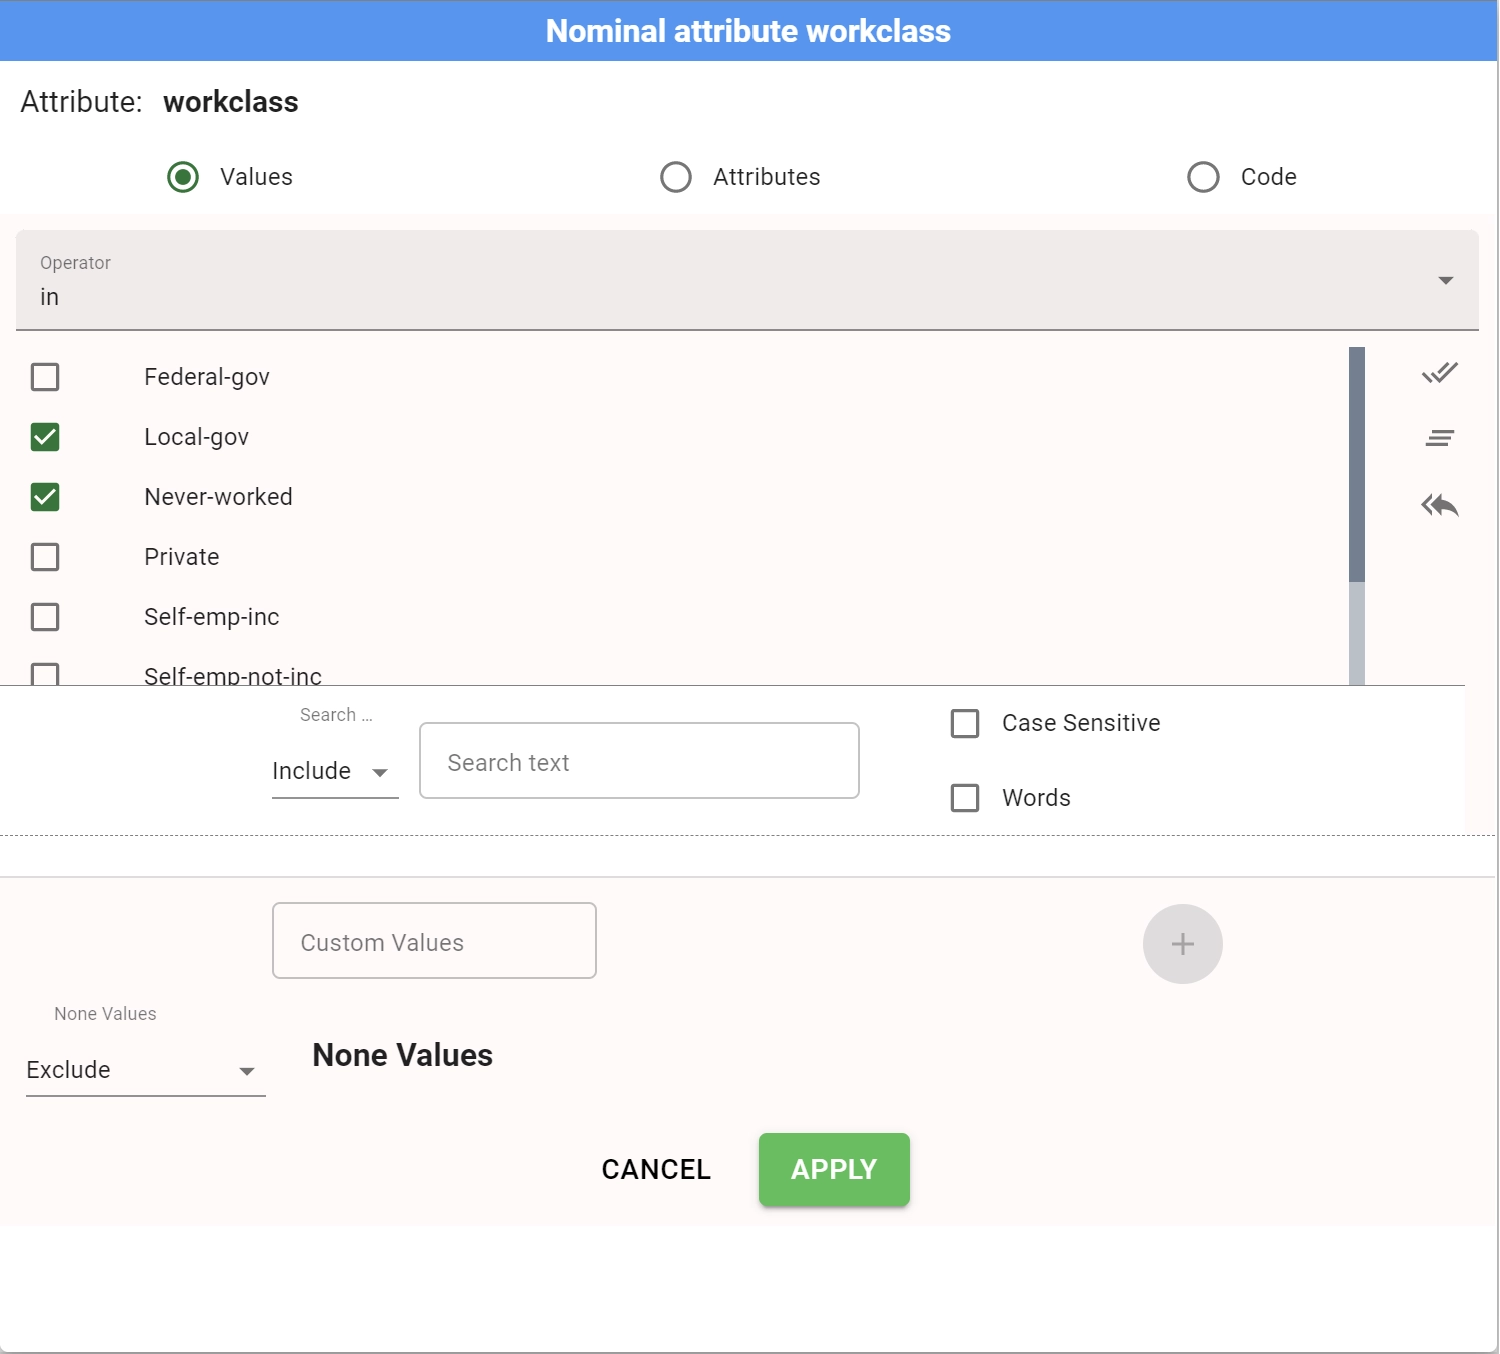
Defining a value condition
If you want to construct a condition for nominal or binary attribute checking if its value are included or not into a fixed set, you need first to define the set.

First you need to specify the operator you want to use for your condition, by using the dropdown menu located just below the condition type radio button:
in: condition is verified if the attribute value is included in the provided fixed set.
not in: condition is verified if the attribute value is not included in the provided fixed set.
Then you need to define the fixed set used by the comparison. This set can include a subset of current attribute values or custom defined values.
To select a subset of current attribute value you operate with the checkboxes list located just below the operator drop down menu. By clicking on any point of a value line you will check/uncheck the corresponding checkbox. Checked attributes are included in the final fixed set.
You can filter the provided list by using the search functionalities available just below the selection value list. You have at disposal the following options:
A Search mechanism type which controls the mechanism to filter the list: * Include: retain all the values which include the searched text. * Match: retain the value which exactly matches the searched text * Starts with: retain all the values which start with the searched text * Ends with: retain all the values which end with the searched text. * Do not include: retain all the values which not include the searched text. * Do not match: retain all the values which not exactly match the searched text * Do not start with: retain all the values which not start with the searched text * Do not end with: retain all the values which not end with the searched text.
Case sensitive option which controls if filtering must take into account text case.
Word option which controls if searched text must be a word therefore separated by spaces from other characters.
These options enable you to filter the provided list and to find your desired value even in a list of several hundreds of values.
Buttons at the right end of the selection panel allows the user to perform bulk operations:
Check all: check all the values included in the provided list.
Uncheck all: uncheck all the values included in the provided list.
Invert: simulate the click on all the lines in the provided list reverting the state of the considered checkboxes.
Important
All these bulk operations are always applied only to the provided list meaning they do not affect any values which is filtered out by searching mechanism. This allows the user to bulk operate on a subset of values selected through a search operation.
If instead you want to add to our fixed set a value which is not already included in the attribute value list, you will use the Custom value entry to add it to the list.
Finally, drop down menu located at the bottom end of the panel states the policy you want to apply to None values. In particular:
Exclude: it will prevent None value lines to verify the condition.
Include: all None value lines will verify the condition.
Note
For performance reason, when the number of considered values in your fixed set is greater than 100, the condition can be inverted into an equivalent one to consider always the smaller set of equivalent values.
If for example we consider a filter on all the countries of the world, we construct an in condition in all the countries except for Australia, the system will automatically change your condition into the equivalent country not in {Australia}, keeping the number of values in the fixed set below the 100 threshold.
Summarizing to configure a value condition panel you can follow the procedure:
Procedure
Drag and drop a nominal attribute from the Attribute list to one of the Filter area to open the nominal condition panel.
Select the type of operator (in or not in) for your condition.
- Select the subset of values you want to use as fixed comparison set. In particular:
Check/uncheck desired attribute values using the search feature to eventually filter the list. Bulk operation buttons can help to remove/add entire classes of values.
Add not already present custom value to the list by writing them in Custom value field and by pressing Plus icon to effectively add them the provided list.
Select the policy to apply to None values by using the dedicated drop down menu.
Click Apply to construct the condition, Cancel to discard your changes.
Defining an attribute condition
If you want to construct an attribute comparison with respect to a nominal or binary attribute, you first need to select the operator you want to use in this comparison.

In particular, available operators are:
==
!=
in
not in
is
not is
Note
Takes into account that the difference between ==, != and is, not is is meaningless if both the compared attributes are nominal or binary due to the None operator properties used in Rulex Platform.
Once you have decided the operator you can select the attribute by using the attribute drop down menu.
Procedure
Drag and drop a nominal attribute from the Attribute list to one of the Filter area to open the nominal condition panel.
Click on the Attributes entry in the condition type radio button.
Select the type of operator for your condition.
Select the compared attribute from the the attribute drop down menu.
Click Apply to construct the condition, Cancel to discard your changes.
Defining a code condition
If you want to construct a comparison between a nominal or binary attribute and the result of a free GOLD code evaluation, you first need to select the operator you want to use in this comparison.

In particular, available operators are:
==
!=
in
not in
is
not is
Note
Takes into account that the difference between ==, != and is, not is is meaningless if both the compared attributes are nominal or binary due to the None operator properties used in Rulex Platform.
Once you have decided the operator you can write your free GOLD code in the dedicated text area. This free GOLD code can include both variables or other attributes references.
Procedure
Drag and drop a nominal attribute from the Attribute list to one of the Filter area to open the nominal condition panel.
Click on the Code entry in the condition type radio button.
Select the type of operator for your condition.
Write your free GOLD code in the dedicated text area
Click Apply to construct the condition, Cancel to discard your changes.