REST API Federated authentication
In the Rest Api Manager window of Rulex Platform Server, the Federated authentication type is available. It allows the creation of new REST API users on Rulex Platform Server by connecting to an external identity provider.
Using a federated authentication, has many related advantages. Among them, the most important are:
The access credentials of the API user are not stored on the machine where Rulex Platform Server is installed.
The groups and roles of the REST API users are directly managed from the identity provider.
Note
Rulex Platform Server supports the following identity providers:
Microsoft.
REST API User Creation Requirements
To start the user creation, the following prerequisites must be satisfied:
- On Microsoft:
A Service Principal with a client secret.
The Service Principal access token must have the claims
app_displaynameandappid.
- On Rulex Platform Server:
In the
settings.yamlfile, the claimeauth.security.disable_idp_token_verificationmust be set tofalse.The machine where Rulex Platform Server is installed must be able to contact the URLs https://login.microsoftonline.com/{tanant_id}/discovery/keys, https://login.microsoftonline.com/{tanant_id}/discovery/v2.0/keys, https://graph.microsoft.com/v1.0/servicePrincipals. More information available on Microsoft technical documentation.
Note
Browse to the paragraph below to know how to create the Service Principal.
Browse directly to the procedure (click here) to create the REST API user which will authenticate to the REST API using the federated authentication IF YOU HAVE ALREADY CREATED THE SERVICE PRINCIPAL.
It is possible to create the REST API user with the federated authentication in two modes, which are specified in the settings.yaml file, in the api.authentication.externalProvider.mode field:
Safest (default): the token exchanged between the REST API user and the server is the one generated by the identity provider, whether the request has been performed through Rulex server or through the identity provider.
Fastest: the token generated through the Auth Token request is generated by Rulex server.
Creating a Service Principal
Every time a federated REST API user is created, it is required that users have the access to a Service Principal.
A Service Principal is the entity using the App Registration (application, in this section) characteristics and properties in Microsoft Entra ID to access the resources in a tenant.
Subsequently, to use a Service Principal it is required to have an application.
Warning
To create a service principal on Microsoft Azure, the minimum prerequisite is that the user has the permissions to manage or register an App registration. The corresponding permissions in Microsoft Azure are Application Administrator or Cloud Application Administrator.
Follow the procedure below to create an application:
Procedure
Select App Registrations from the left panel in Microsoft Azure portal.
Click on the New registration button located on the upper-left side of the page.
Type the name of the new application in the Name field.
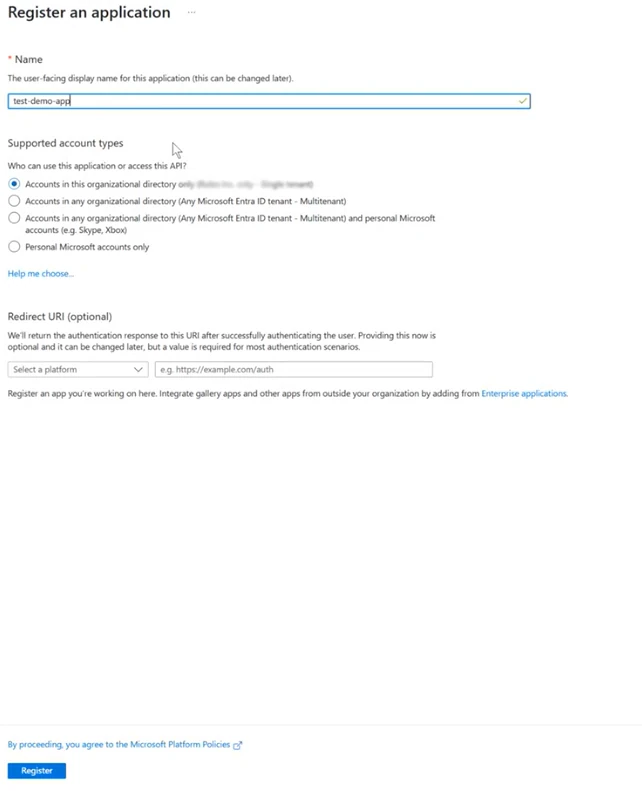
Select Accounts in this organizational directory only in the Supported account types section.
Click Register to register the application. The application page automatically opens.
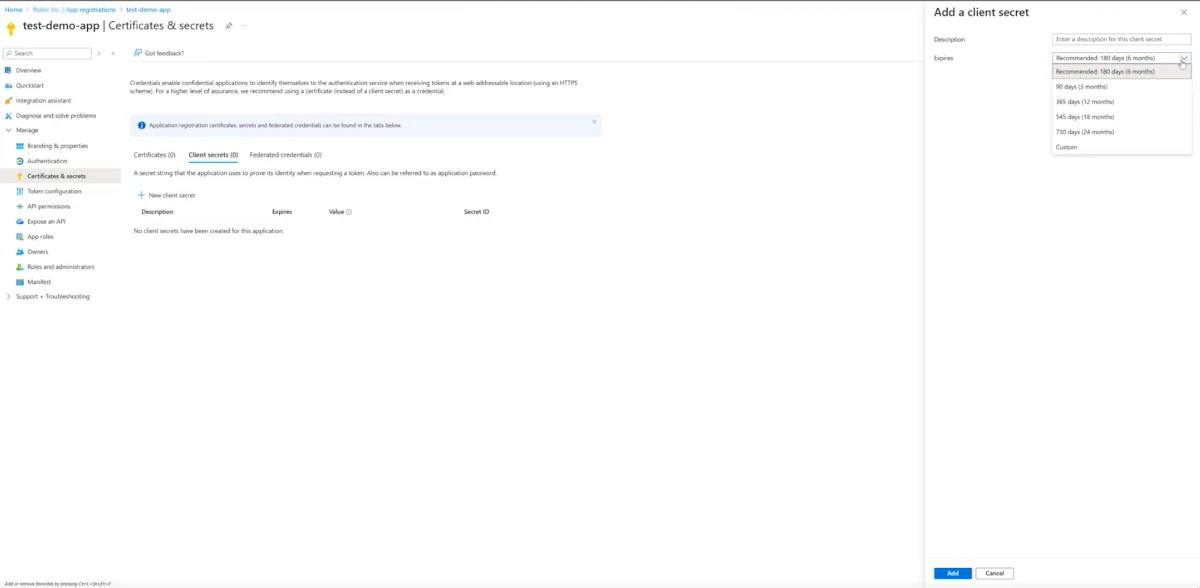
Click on Certificates & secrets button from the left panel to open the corresponding page.
Click on the New client secret button in the Client secrets tab.
Type a Description and select from the Expires drop-down menu the duration of the secret. Click Add to add the new secret.
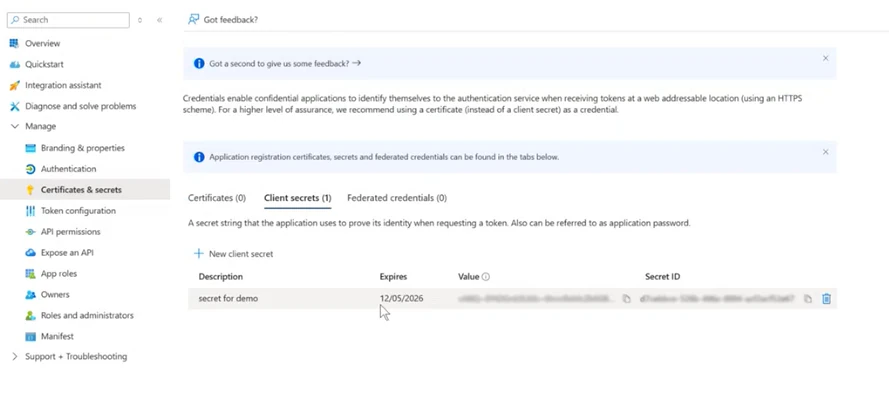
Copy and save the token contained in the Value field, as it is available only immediately after the application creation. It will be used as the client_secret when authenticating as a federated user.
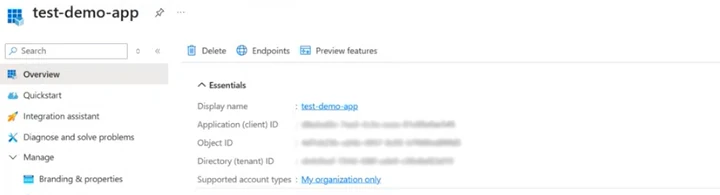
Click on Overview in the left panel.
Copy and save the Application tenant ID, as it will serve as the client_id while authenticating.
Creating a new REST API User and Performing the Authentication Request
This paragraph explains the creation of a federated REST API user and how to perform the Auth Token request with it.
To create a new REST API user, follow the procedure below:
Open Rulex Platform Server.
Click on the User icon.
Click Manage rest api to open the Rest Api Manager.
In the Rest Api Manager window, add a new REST API user by clicking on the plus button in the left panel.
Specify the name which will be associated to the REST API user, which must be the displayed name of the Service Principal.
Select Federated in the Authentication area.
Check that the product key in the Product Key field is correct.
Click Save Changes to add the new REST API user, otherwise click Discard to close this panel without saving any changes.
Click Close to close the Rest Api Manager window.

Warning
Rulex Platform Server does not perform any validation on the existence of a Service Principal with the same name specified in the username area on your identity provider.
To retrieve the authentication token, follow the steps below:
Retrieve the token: depending on the authentication type, two different operations must be performed:
If the Safest authentication has been chosen, the token is directly retrieved from the identity provider (linked here for Microsoft) and can be used as any other bearer token within the Authorization header.
- If the Fastest authentication has been chosen, follow the steps below:
Retrieve the authorization token (using Postman, for example) by sending the Auth Token request, specifying the value client_credential as the grant_type, and the identity provider username and password as the client_id and client_secret, respectively.
Specify https://graph.microsoft.com/.default in the scope field.
Send the request.

Use the generated token as the bearer token in the Authorization header in any Rulex Platform API request.
Tip
The discrimination between internal and external API client is made through the scope field in the Auth Token request. More specifically:
If the scope field is empty, the internal API client is used.
If the scope field contains the string
microsoft, the scope will behttps://graph.microsoft.com/.default.Any other scopes different from those specified will return an error and are not valid.