Actions
Actions are Widgets of Rulex Studio which allow performing filter operations on the represented data on the slide.
In Rulex Studio, users can choose among different types of Filter actions:
Actions differ one to the other not only graphically, but also by the way they filter data: for example, some actions allow filtering only one value at a time, some allow filtering multiple values, some allow filtering numbers only.
In the Actions layout menus page , users will find all the information regarding the available configuration options of each action type, as well as their filtering characteristics.
Note
The event triggers available for the Actions widgets change according to the action type. A box with a list of the event triggers available for each action filter is available in the corresponding page.
As previously said, Actions are strictly related to other Widgets on the same slide as, once they have been dragged, they are automatically linked to all the other widgets (excluding other actions) on the slide to create a dynamic dashboard. This link between an Action and all the Widgets can be edited in the scope section, as explained below.
The first step to start working on actions consists in dragging an Action onto the stage and, subsequently, dragging the attribute whose values will be filtered by the action.
As soon as the attribute has been dragged onto the action, the Layout options window will automatically open and will allow users to start the configuration process.
If users try to open the Layout options menu, the INPUT tab will be empty, as it populates with options according to the type of the attribute which has been dragged onto the widget and according to the action type.
The Layout options menu is made of two tabs:
INPUT tab, where users define all the information regarding the data to import and the filter/s to set. it is not populated with options if the Layout options menu is opened before dragging an attribute on it.
LAYOUT tab, where users customize the action layout. This menu changes according to the corresponding action type. More information on the options available and on the compatible attribute type for each Action can be found in the Actions layout menus page.
In the Scope Options section, in the Scope text field, users can specify the Widgets to which the filter will be applied.
By default, all the widgets which are present on the slide are included in the Scope, but users can also edit this list, by using the text field or by opening the Select wanted window, where a list of all the widgets on the current slide is present and can be checked or unchecked.
As a result, the Widgets specified in the Scope will update and will show the filtered data only when the Action is active.
Tip
It is possible to leave the Scope empty, with no widgets linked on it, so that events can be set up, for example Code events, which allow using Actions widgets as event activators.
The Filter Propagation
Actions, as the others widget do, propagate their operations to those indicated in the Scope field.
By default, all the Widgets of the current slide appear in the Scope box and if no changes are made, the filter will be applied to all of them.
If instead, users want to apply the filter to some Widgets only, it is possible to manually type the desired widgets names in the Scope box, or select them in the list that appears when clicking the icon next to the box.
To know each widget’s name on the stage and to locate it, users can browse the Slides tab.
In fact, if different Widgets, representing data from different tables, share an attribute with the same name, the filter will be propagated to all of them.
Warning
Filters are propagated only once.
If different Widgets operate on an attribute which is found in more than one table, the filter will be propagated to all the attributes.
Example
The following example uses the Client Data and the Transactions datasets.
Both datasets contain an attribute called Id, which is the attribute which will make the filter propagation possible, so basically both datasets will be filtered, even though the action was active on a specific attribute on one dataset.
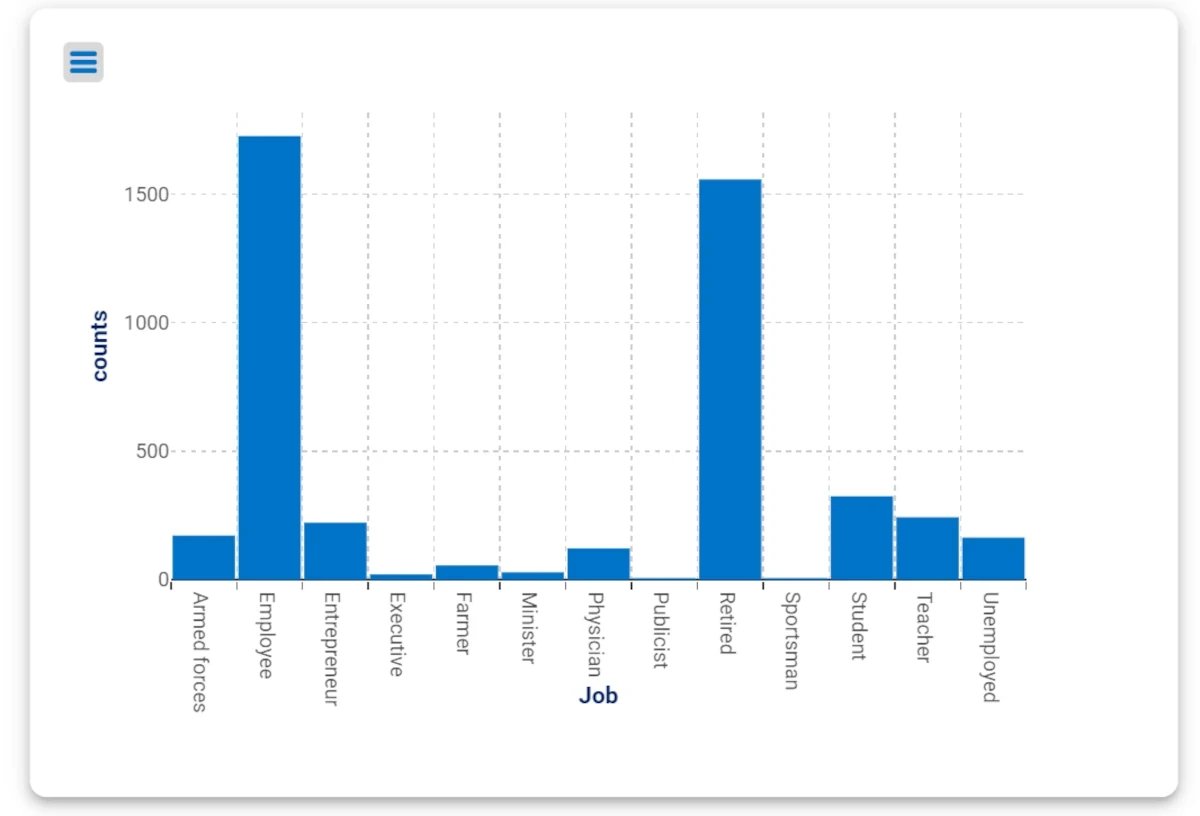
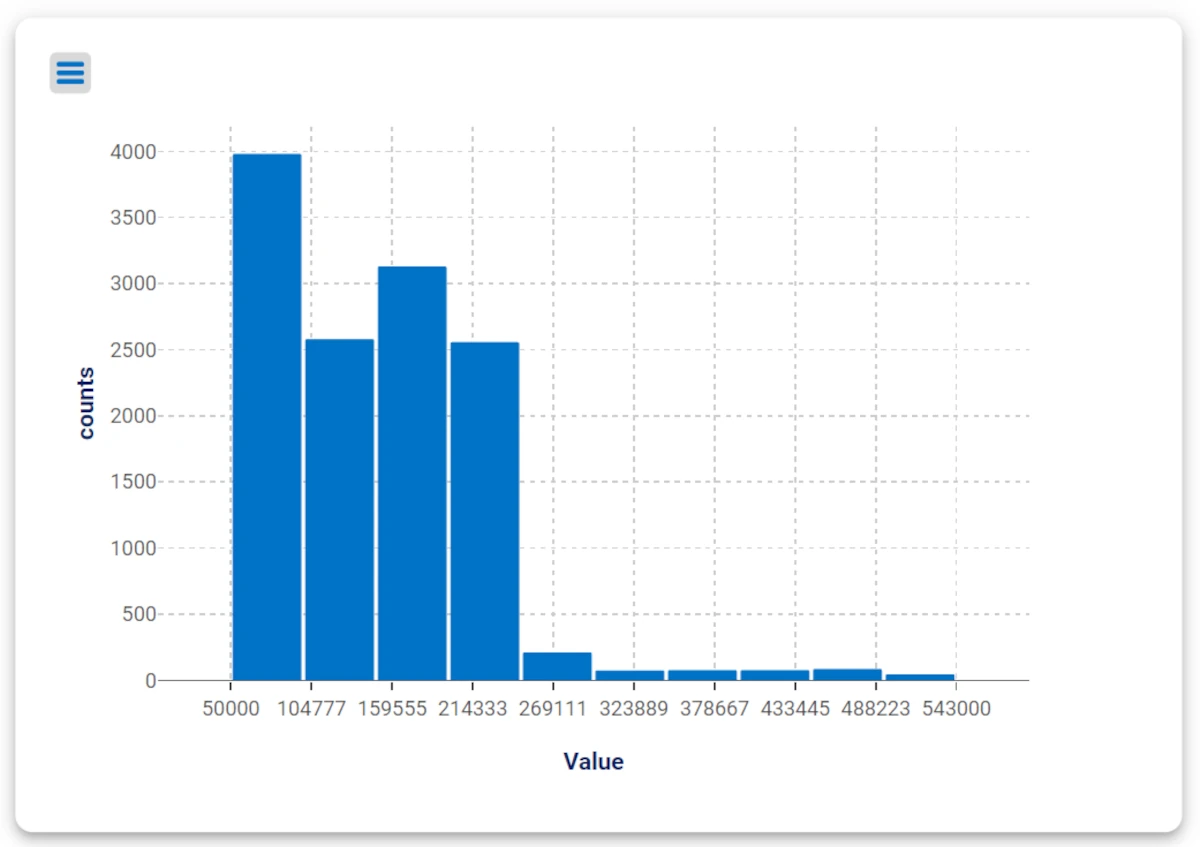
In this case we are going to use the Filter drop down menu, two Vertical Bar chart and attributes from the tables: Clients_data and Transactions.
Drag the attribute Job contained in Clients_data table onto the X Axis of the first plot.
Drag the attribute Value contained in the Transactions table and onto the X Axis of the second plot.
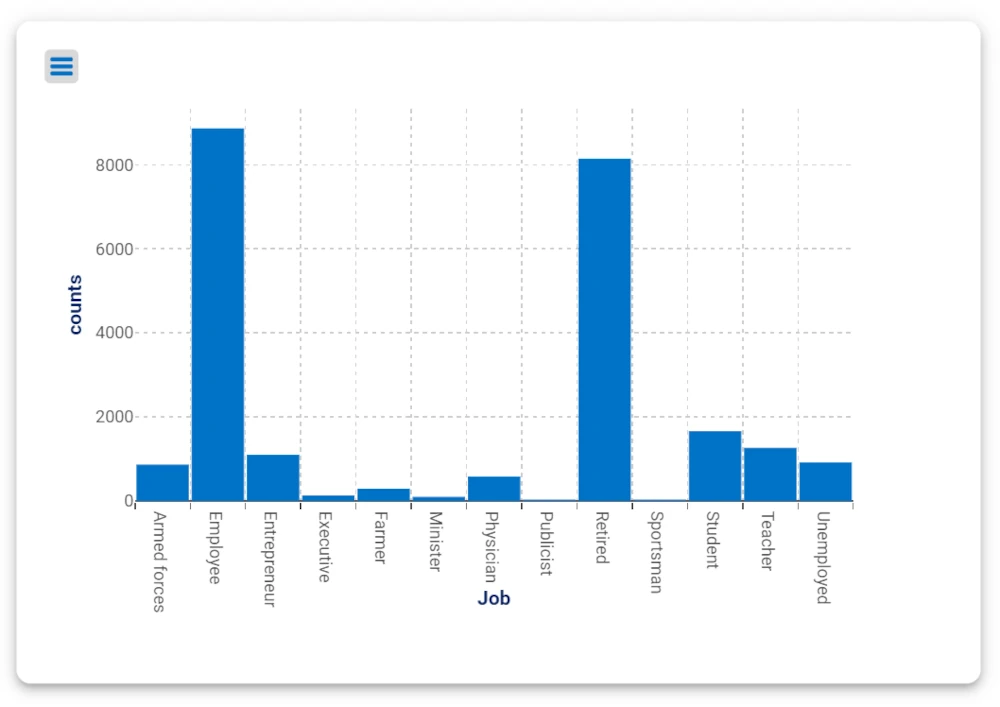
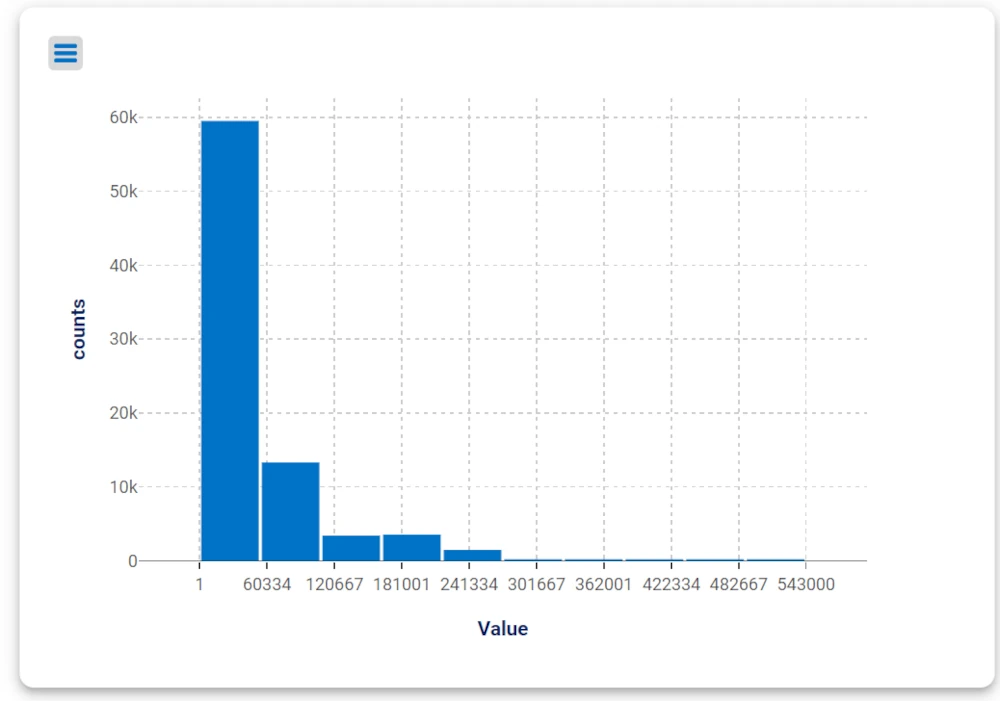
Drag a Filter drop down menu onto the slide and drop onto it the attribute Product contained in the Transactions dataset.
At this point, the Layout options tab automatically opens. The Table and the Attribute sections are already filled out. The Scope field is automatically filled with all the other widgets on the slide.
Select the Loan value in the Filter drop down menu.
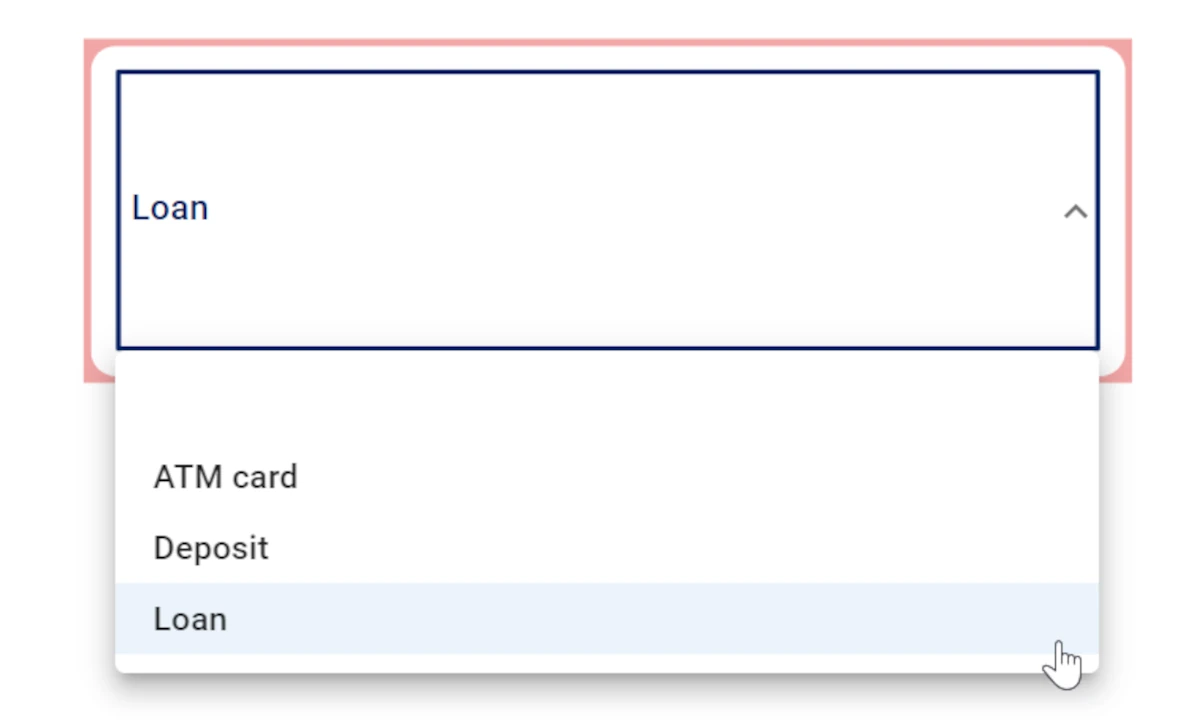
Once the filter has been applied, both plots will show a graphical representation of data according to the filter.
Note
This behavior happened because the filter which has been created on the Product attribute of the Transactions dataset has been applied to all attributes within the dataset itself but, as the Id attribute is present also in the Clients_data dataset, it has been propagated to the Id attribute in the Clients_data dataset and to all the other attributes within the dataset.
As you can see, the first plot will show the loan data based on the job of the subjects, while the second plot will show the loan data based on its value.
