If-Else task
The If-Else task allows you to introduce a condition for the computation of a subsequent branch exiting this task. Unlike the Select Outputs task, the condition imposed here is exclusive. For this reason, it allows you to conditionally execute only one of the child branches.
It is important to note that the condition affects the computation behavior but not the data propagation. As always in Rulex Factory, any computed child receives all the preceding data structures flowing into the wire.
The tasks belonging to output branches that are not selected by the task for the current computation are moved to the Skipped State. A skipped task is not considered in the current computation, does not own data, and does not forward data to its child tasks. The behavior of tasks with multiple parents — some computed and some skipped — is controlled by the flow Skip policy. This policy also controls the behavior of the Import from Task task when importing data from skipped sources.
Its layout consists of a single tab, the Options tab.
The Options tab
The Options tab is divided into two regions. In the upper section, a list of drop-down menus and checkboxes allows you to configure the general behavior of the task. This panel contains the following options:
Else task: this is the branch executed if the configured condition is falsy. It cannot coincide with the branch selected as the conditional branch.
- Logical operator to be used in multi-row conditions: the result of the condition must be a single True or False value.
If the inserted condition evaluates to a vector (for example, by using non-constant attributes), this is the operator used to aggregate the result. By default, the final value will be the and of all entries in the vector.
Compute tasks without specified condition: specifies what to do for branches connected to the task that are selected neither as conditional nor as else tasks. If checked, all such branches are still computed; otherwise, they are always skipped.
The bottom section is occupied by the rule selector and allows you to configure a condition for the outgoing branches.
In the If-Else task you can configure a single condition; therefore, the Plus icon that allows you to add a condition for an outgoing task can be pressed only once. Once pressed, a popup appears to guide you in selecting the outgoing task whose execution you want to conditionally control. This list is stripped of the outgoing task selected as the possible Else Task to prevent name conflicts.
Once a task is selected, to modify it you must first delete it using the Delete icon on the header tab next to its name, and then add a new condition using the Plus icon, which is now available again.
The condition for any task is defined using the Rule controller present in the tab below. The next section is dedicated to its description, which is shared with the Select Outputs task.
Attention
The configuration of several options in this task relies on the names of the output tasks. Remember to connect the outgoing tasks before opening the task configuration to properly populate the drop-down menus.
The Rule controller
Any task you want to conditionally execute requires the definition of a Rulex Rule. A Rule in Rulex is a sequence of conditions or boolean operators all combined with either and or or. To add a new condition, first press the Plus button located at the top of the tab’s internal space. If you are modifying an already-defined rule by adding an extra condition, the Plus icon will be located at the bottom of the list of rows.
Once pressed, a new row is added to the condition table. In the text box you can write a condition in the same format as the Rule Manager; however, the Edit icon located to the right of the text box helps you define the condition through a visual wizard.
The condition wizard is composed of two steps:
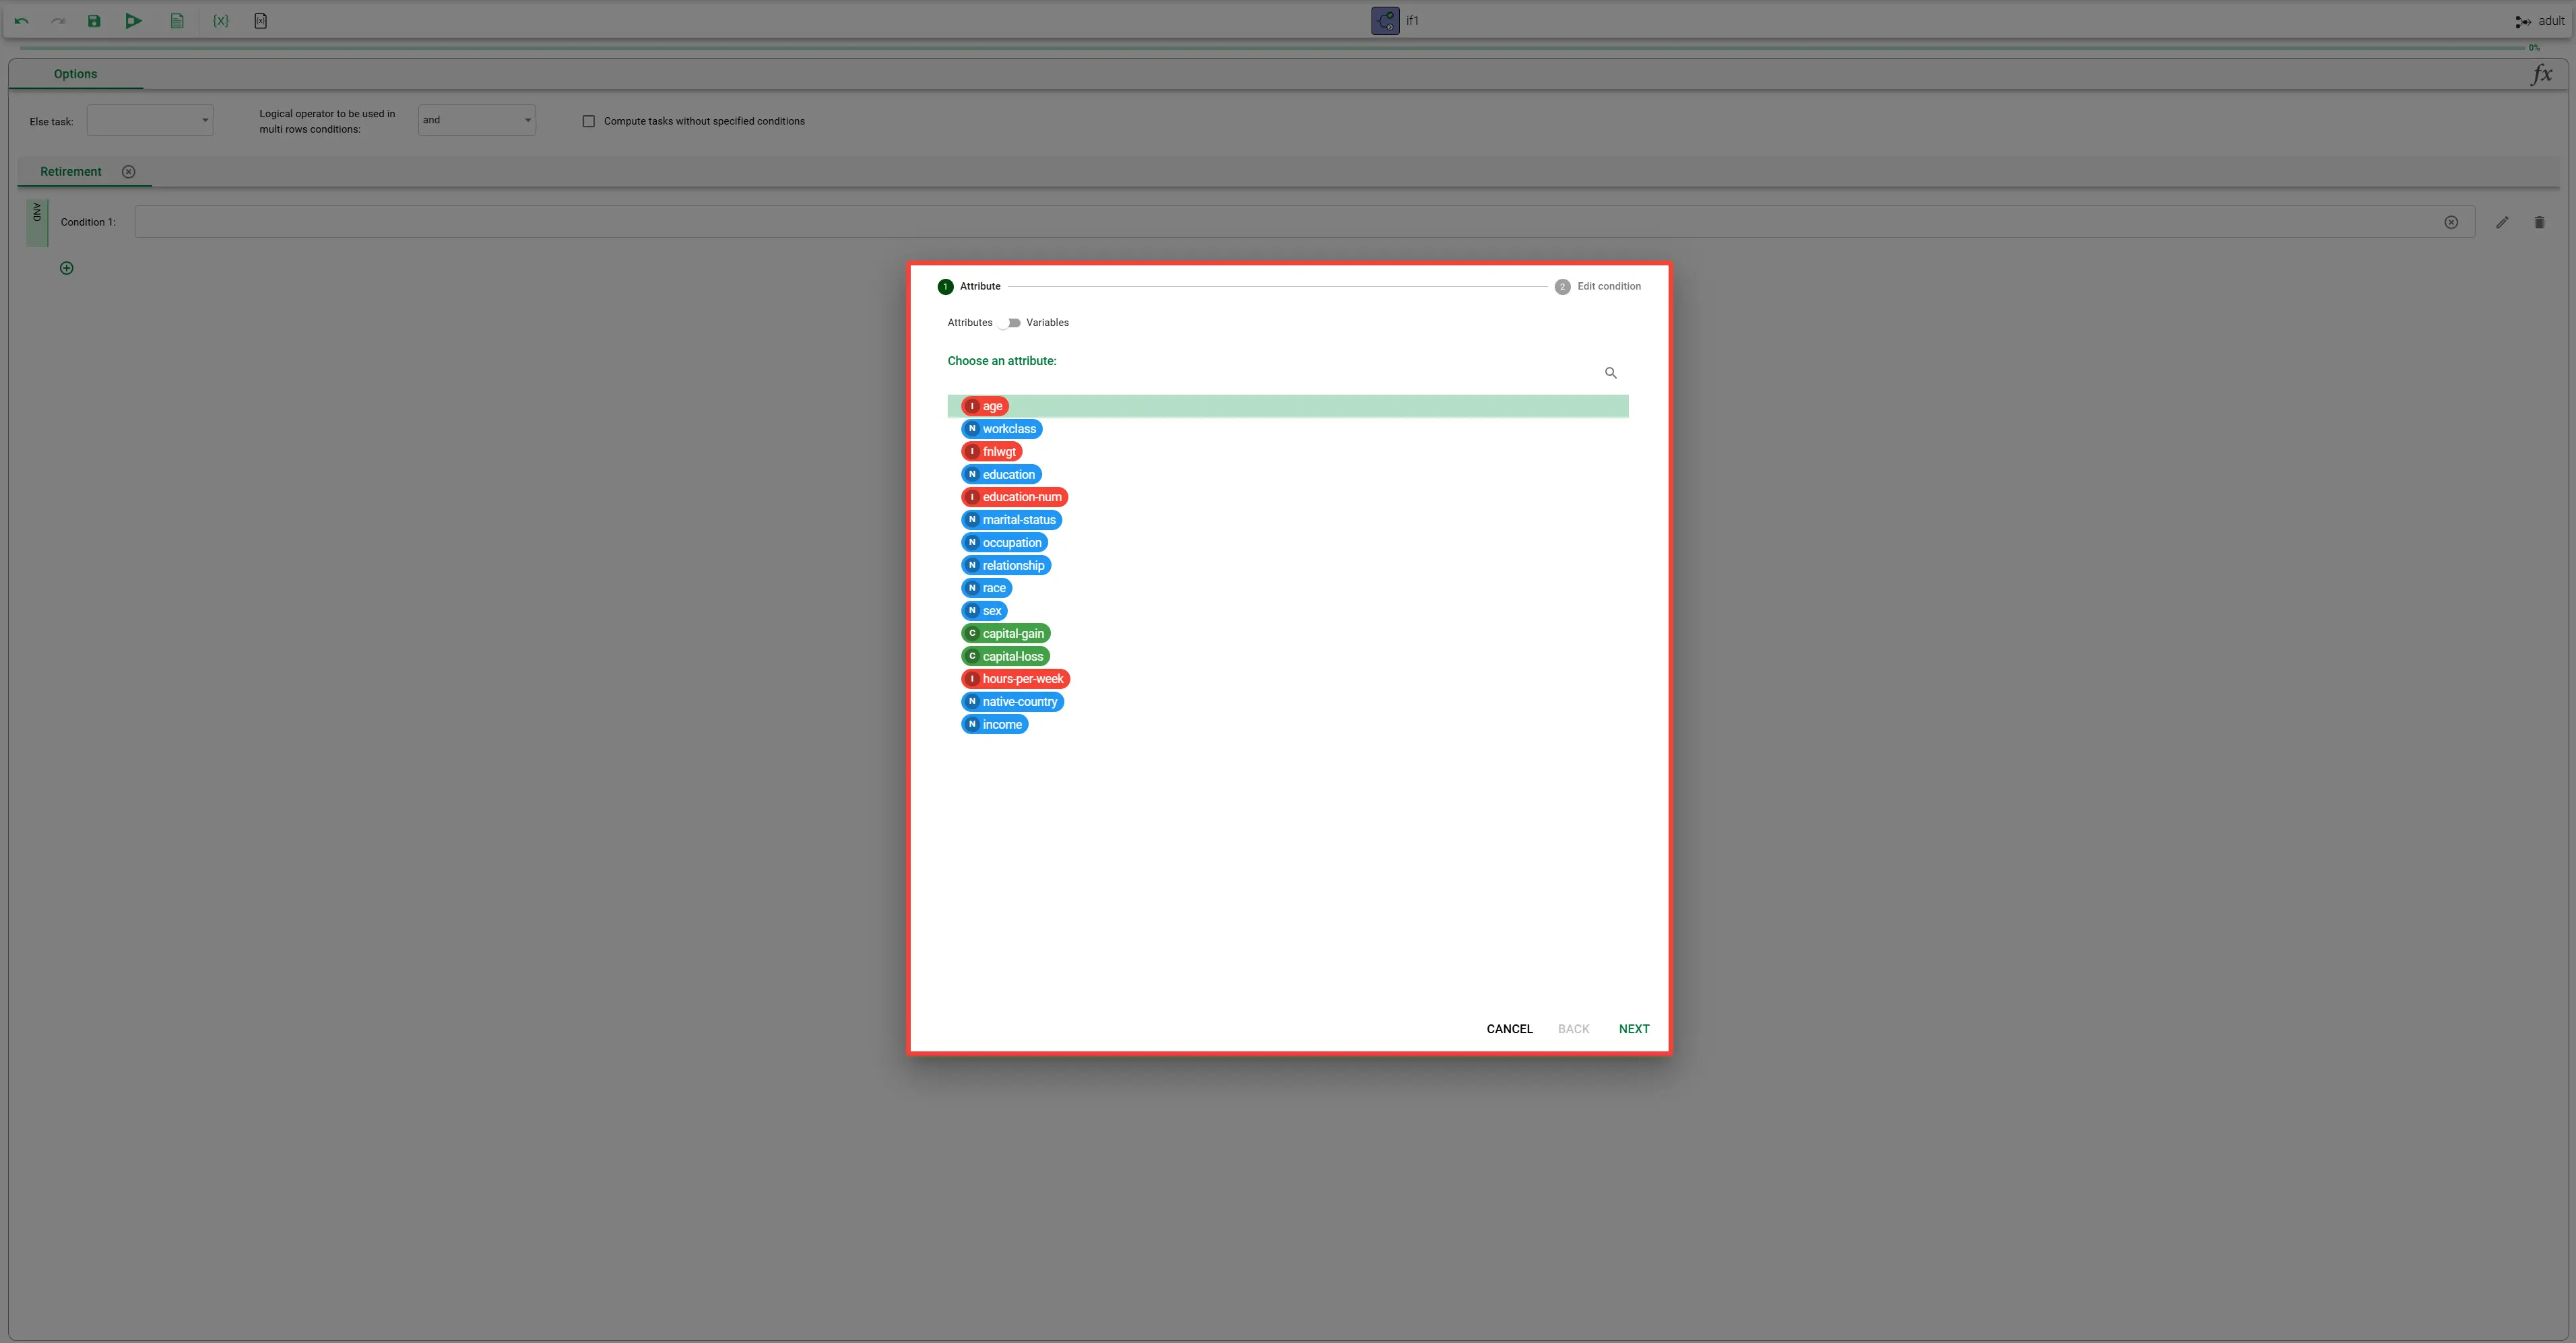
In the first step, you select the Attribute or Variable you want to use in your condition.
In the second step, you define the actual condition through a panel similar to the Filter query.
You switch between Attribute and Variable using the toggle located in the first step.
Once you have selected an Attribute or Variable in the first step and pressed Next, the corresponding condition panel is presented according to the Attribute or Variable type:
- For the Attribute choice, the Value part of the condition panel is always shown; please refer to:
this section for integer, continuous, currency, and percentage attributes.
this page for nominal and binary attributes.
this reference for date, month, quarter, week, datetime, and time attributes.
- For the Variable choice, the Code part of the condition panel is always shown; please refer to:
this section for integer, continuous, currency, and percentage variable values.
this page for nominal and binary variable values.
this reference for date, month, quarter, week, datetime, and time variable values.
Note
If the value of your variable is None, it does not have a real type. It is therefore shown as undefined in the first step, and the same condition panel as *nominal* is presented.
Once you have configured the desired condition, press Save to close the wizard and automatically construct the correct code in the corresponding text field. You can return to the first step at any time by pressing the Back button, or leave the wizard without making changes by clicking the Cancel button.
The Delete icon at the end of a condition’s text box allows you to clear the code without deleting the condition row, while the Remove task condition icon located at the far right of the condition line removes the condition entirely, shifting all subsequent rows up.
If you click the Edit icon on an already-defined condition, the wizard jumps directly to the corresponding second step to immediately guide you in modifying the condition code. However, you can always return to the first step by pressing the Back button at the bottom right of the wizard window.
The green sidebar spanning all the condition lines indicates the logical operator used to concatenate the different conditions into a single Rule. By default the and operator is selected, but it can be changed by clicking on the top of the sidebar, toggling it to the or operator and vice versa.
Hint
All these entries parametrically construct a single option in the form of a GOLD dictionary with the name of the conditional output task as the key and the entire concatenated code of the selected Rule as the value. In Parametric view you can directly edit the option using the same code format used in the Rule Manager.
Example
The following example uses the Adult dataset.
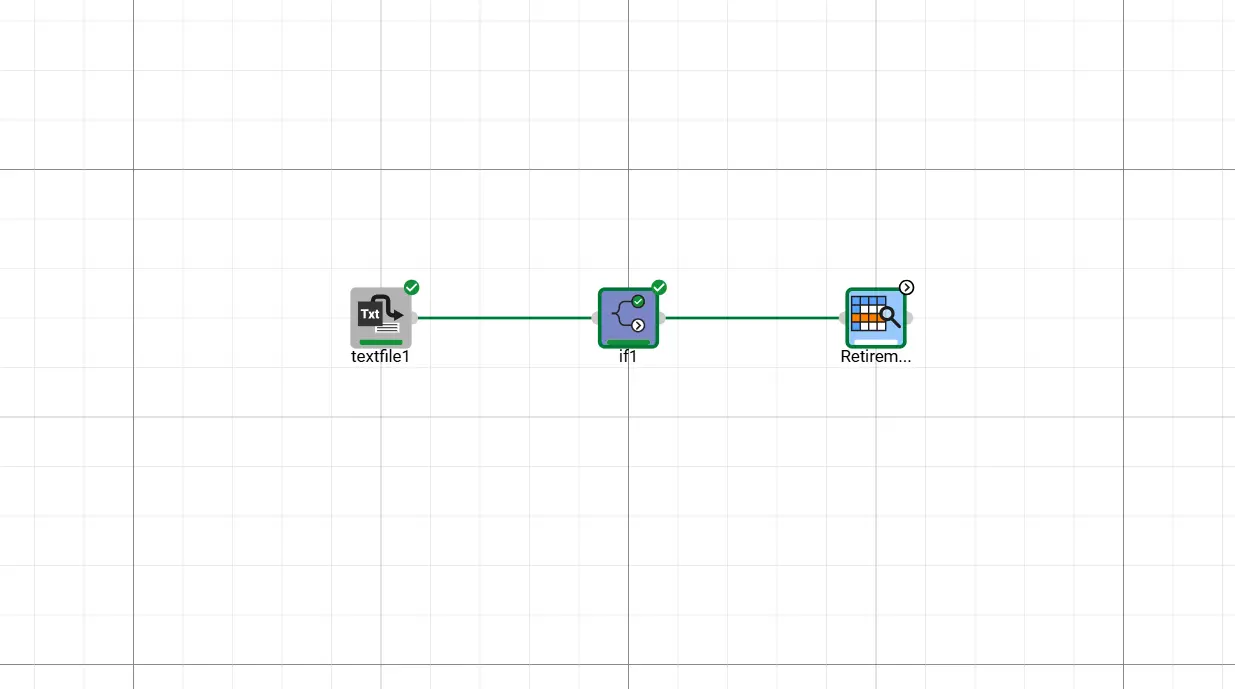
In this example, after importing the dataset, I want to continue the execution only if all rows in the dataset contain persons with an age greater than
60.Add an If-Else task to the flow. Add an outgoing Data Manager named Retirement and connect it to the If-Else task as a child task. Then, set the following options: * Logical operator to be used in multi-row conditions: and
In the Rule selector below, click the Plus button and from the appearing pop-up select the outgoing task Retirement and click Add.
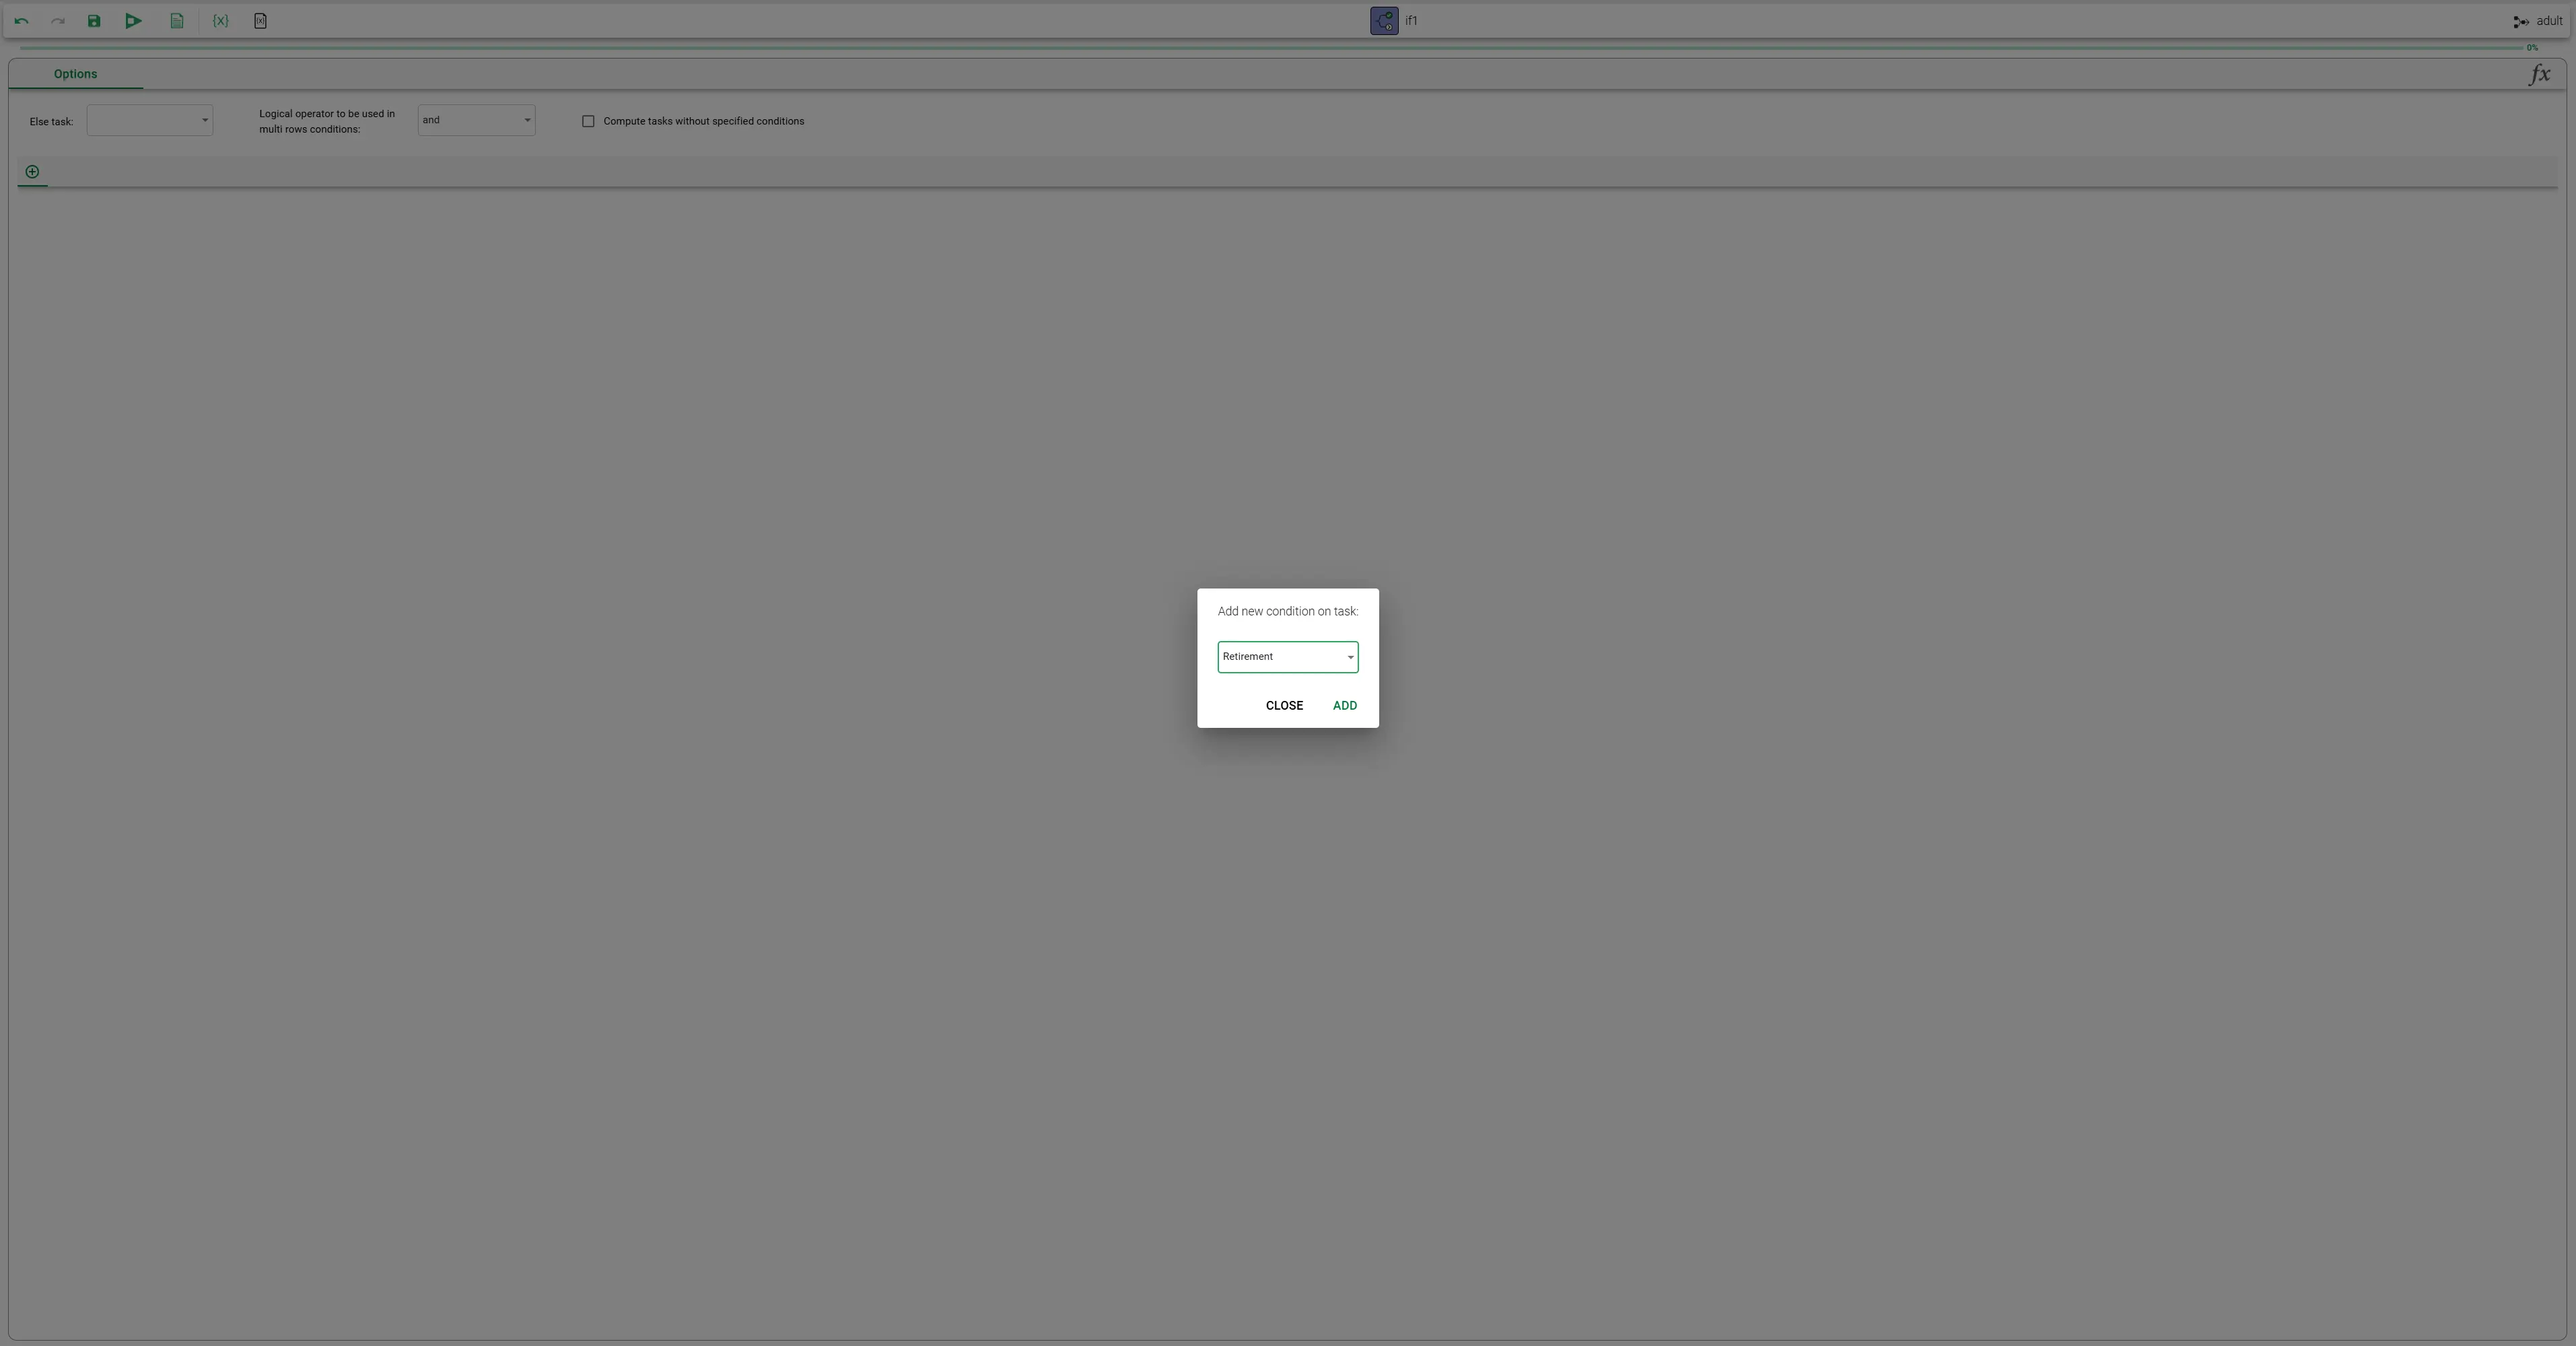
Click on the Plus button in the newly added tab to add a condition row. Then press the Edit icon at the end of the condition row to open the Condition Wizard.
In the first step, select the Attribute age and click Next.
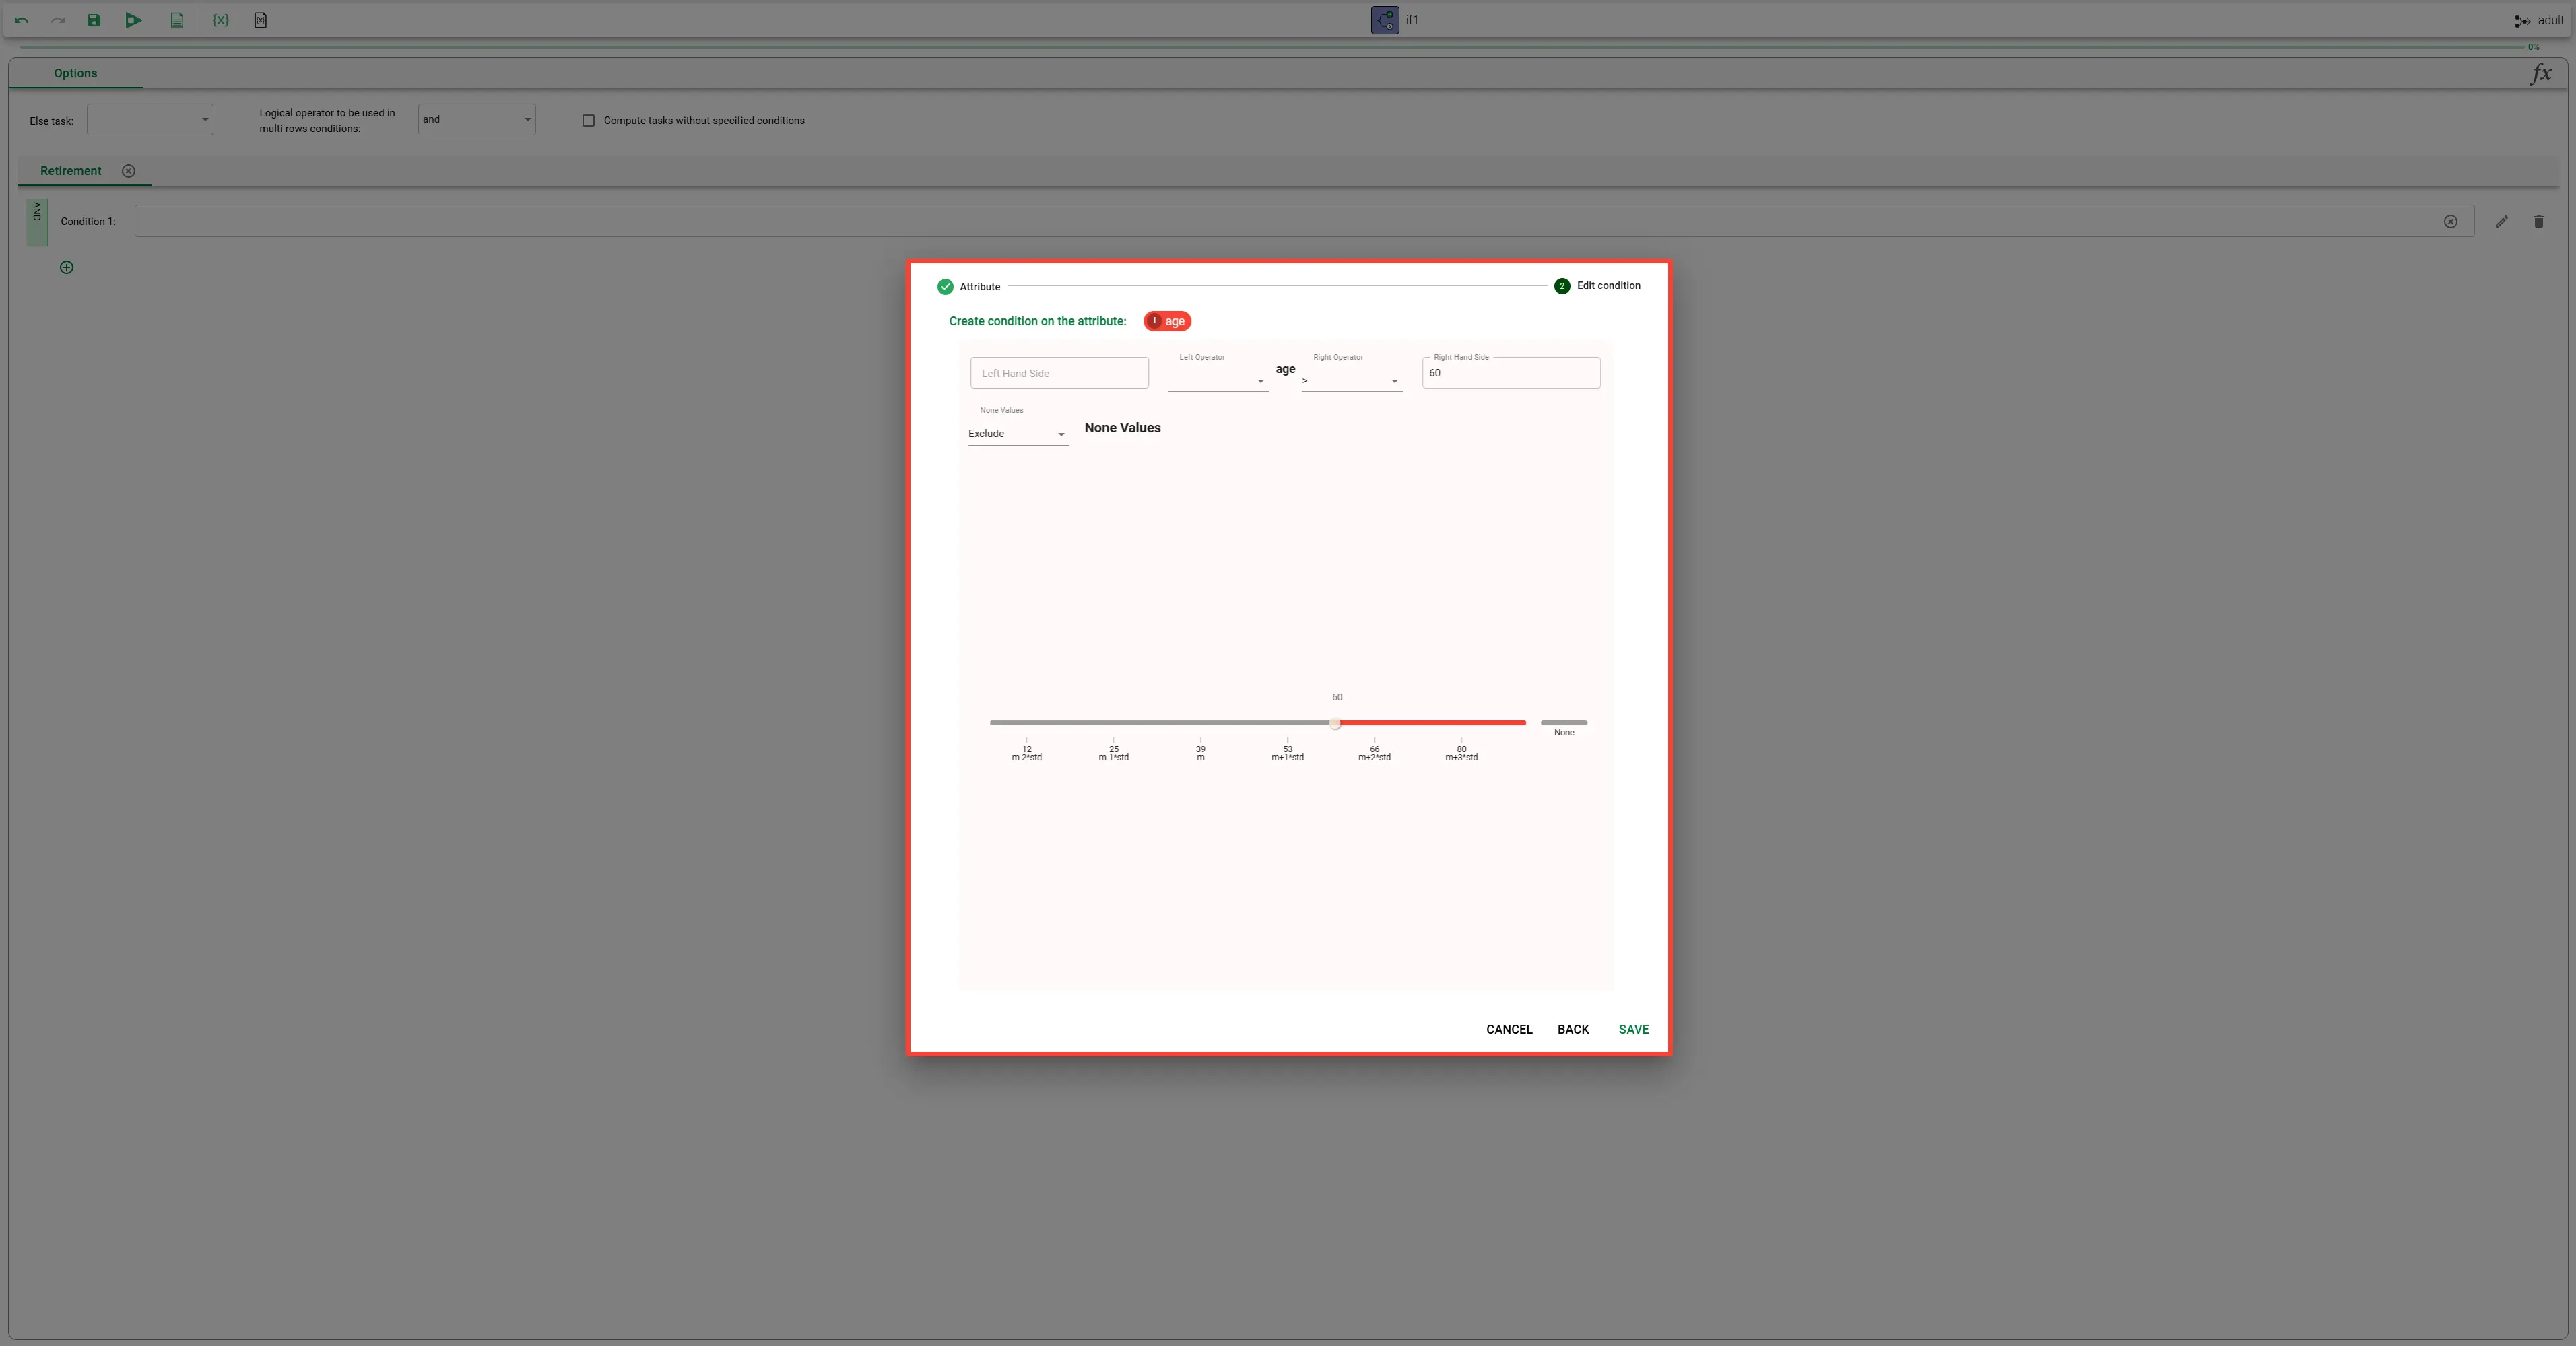
In the ordered condition panel configure the condition
$"age" > 60and click Save.
Now close the task and from the stage compute the If-Else task and the Retirement Data Manager.
The Data Manager should appear with a Skipped status, since the condition has been evaluated as
False.